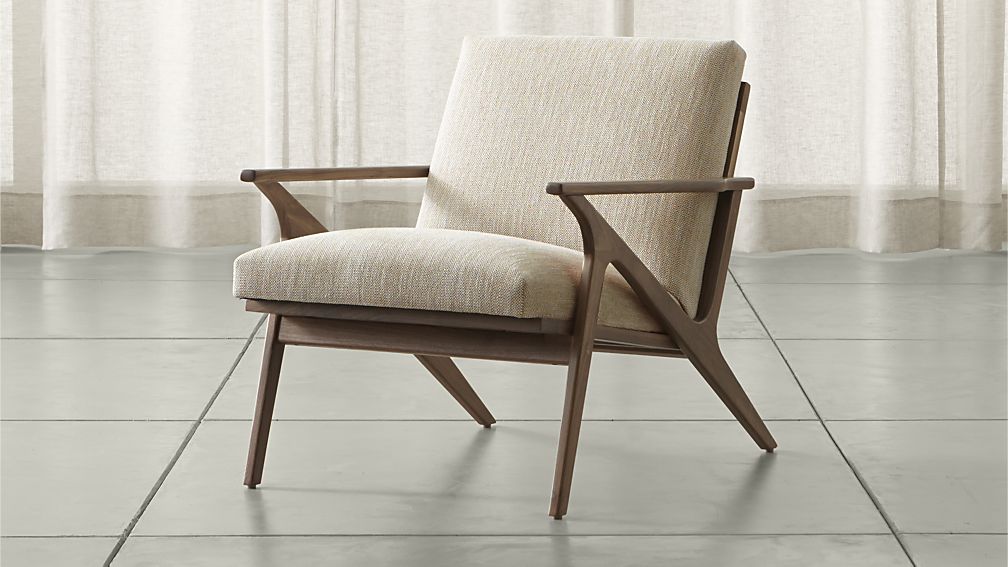
My latest project/descent into madness started with a chair that Carrie saw in a Crate and Barrel catalog:
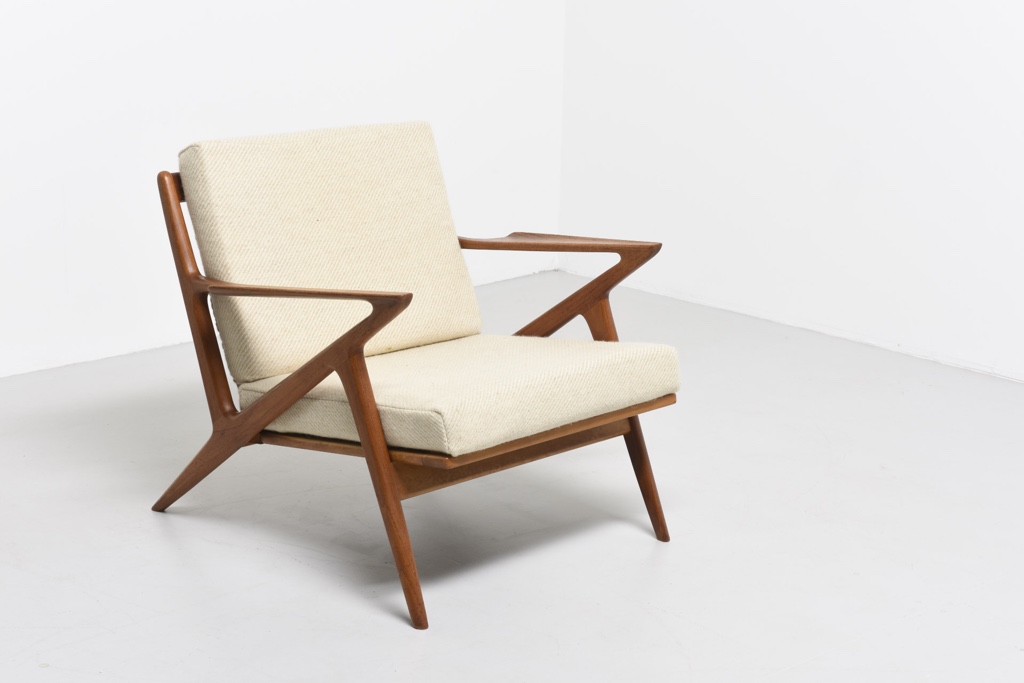
I learned through some internet research that the Crate and Barrel chair is a knockoff of a mid-century modern Danish design by Poul Jensen called a Z-Chair, and the original is quite a bit more attractive:
Not wanting to pay $1000+ for a chair that we'll rarely sit in (it's going to replace a leather arm chair that the cats have shredded that we also rarely sit in), and wanting a challenge, I set out to duplicate it as best I could. Mine wouldn't be nearly as delicate, mainly for fears of structural integrity problems. I'd hate to put in a ton of work on a project to have it collapse (and whether it will hold up over time will remain to be seen).
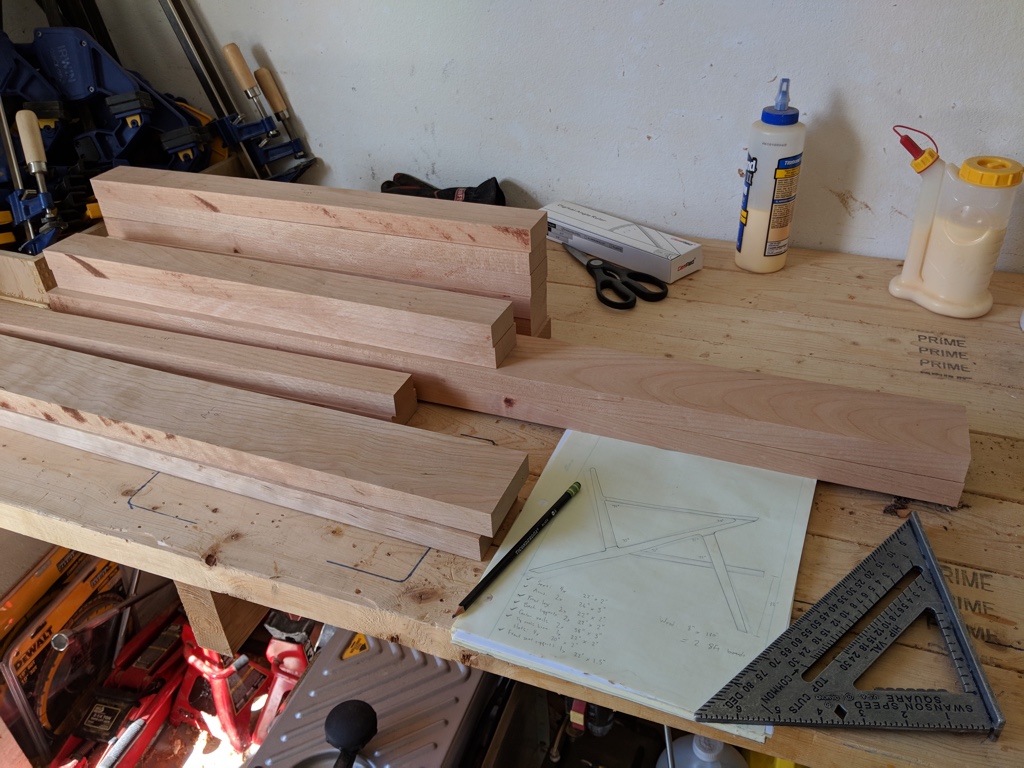
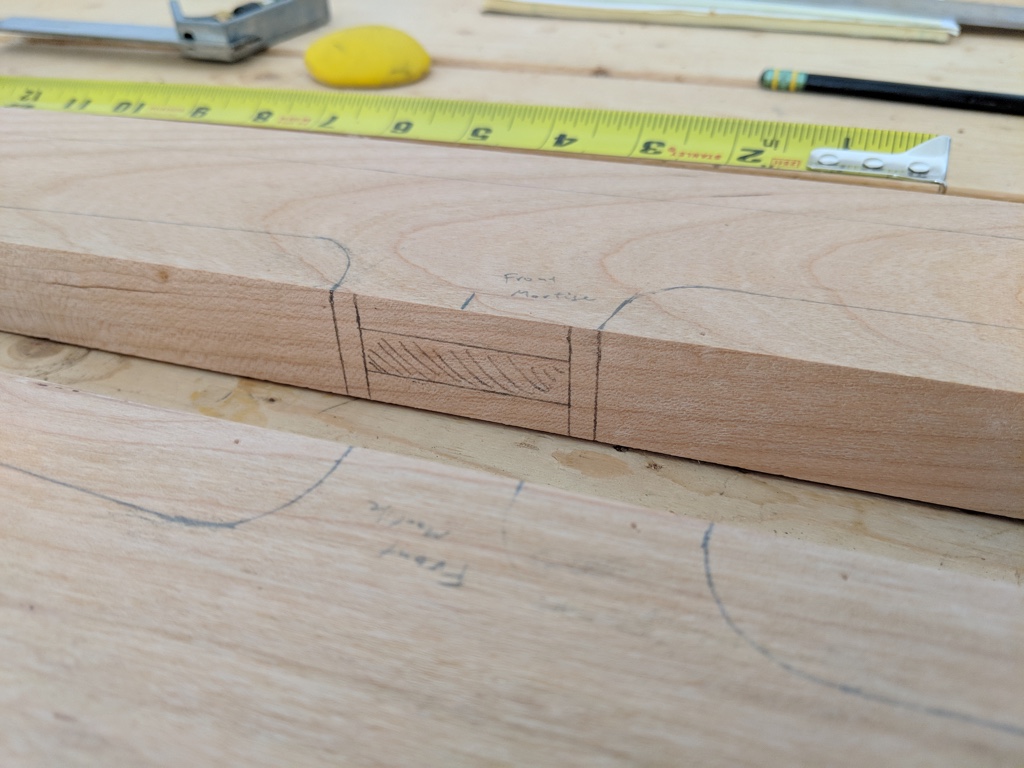
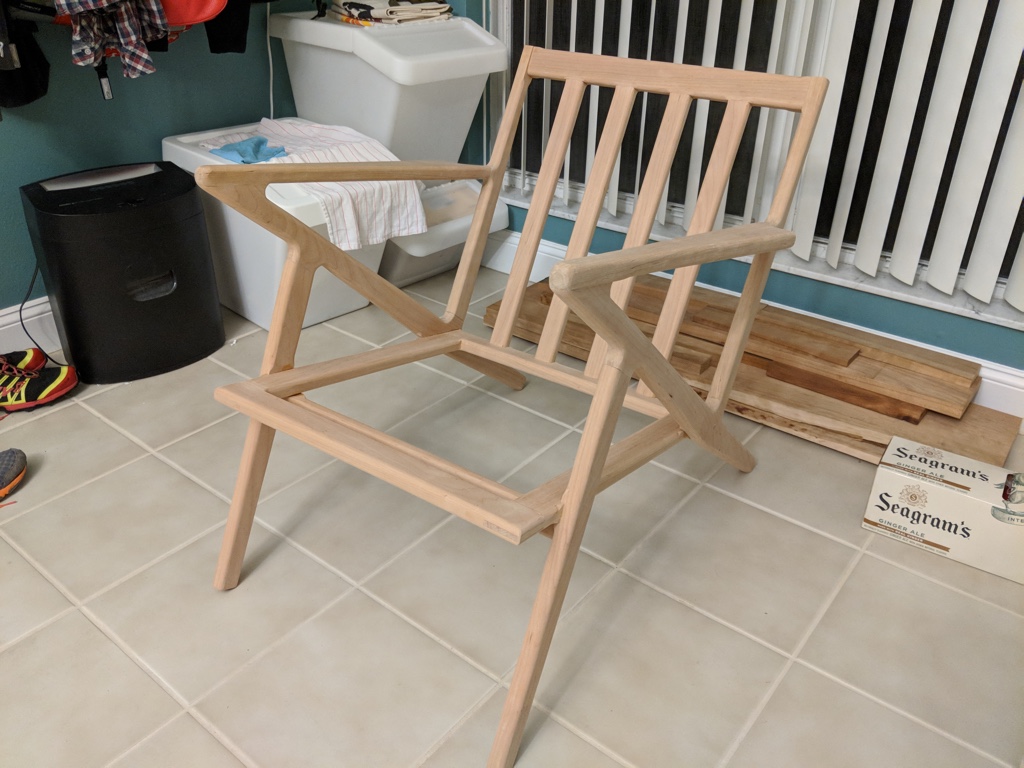
There being no available plans online, I started reading various blogs of other people who built one and ended up doing a sketch based on the side profile of one I found online. I used the sketch to figure out intersection angles and plan out how the joints would meet. You can see my sketch next to the pile of boards that will become my chair.
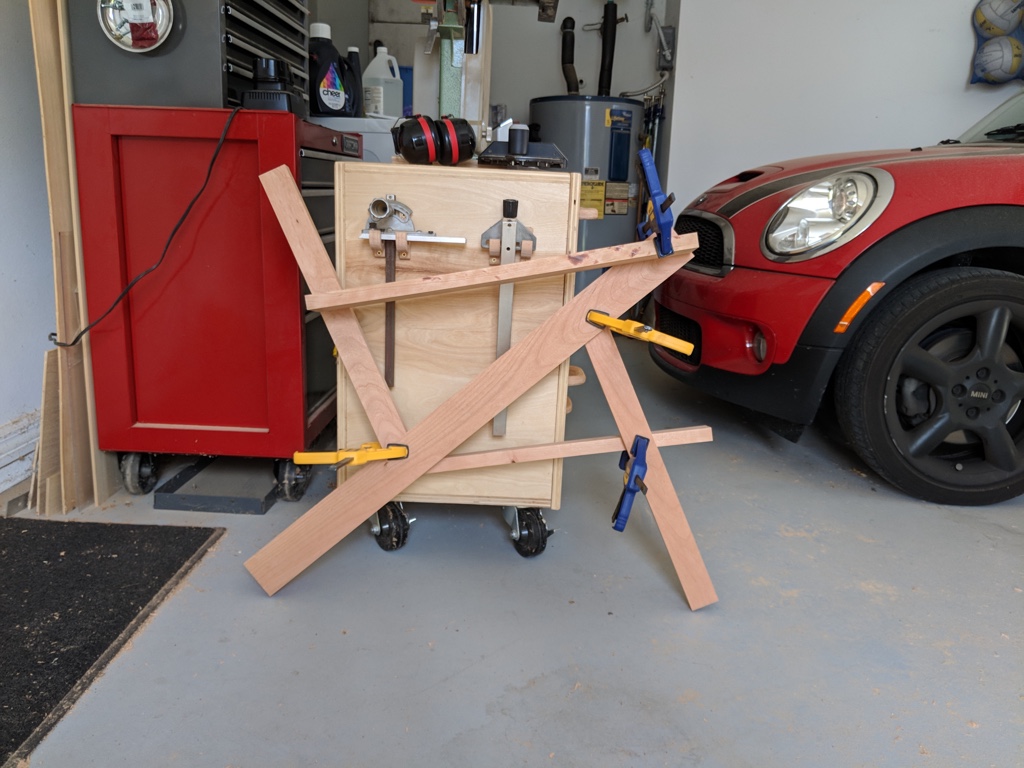
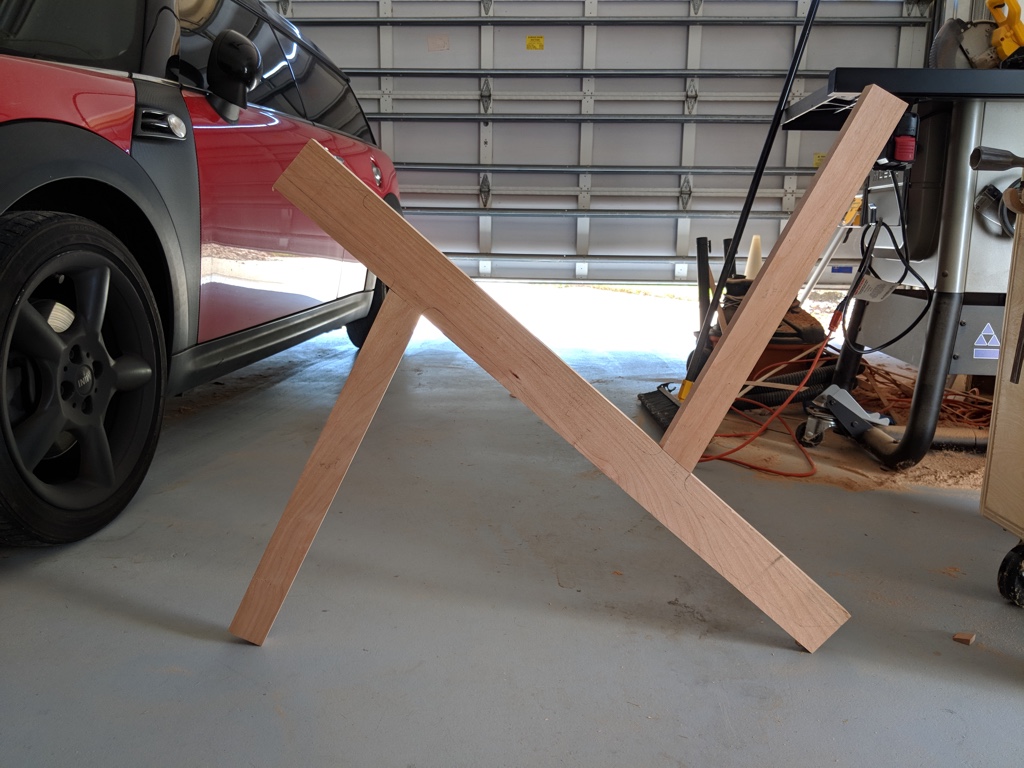
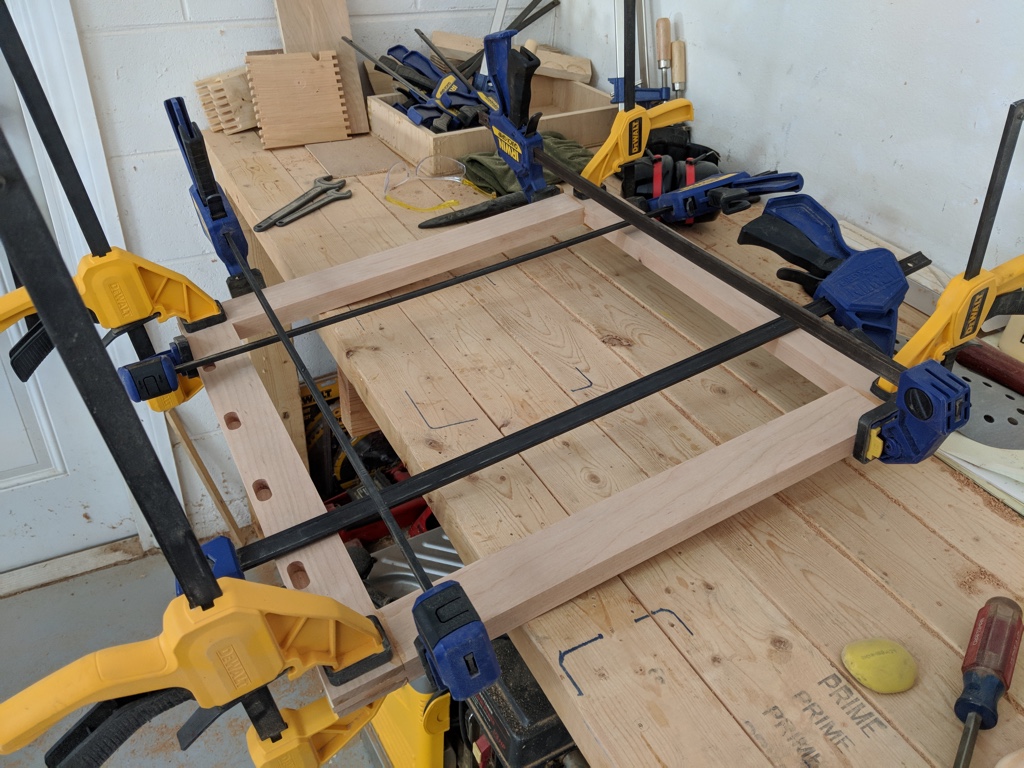
First up a I clamped the boards together in the rough shape they would end up in to help visualize the chair as well as finalize some dimensions related to where the pieces intersect.
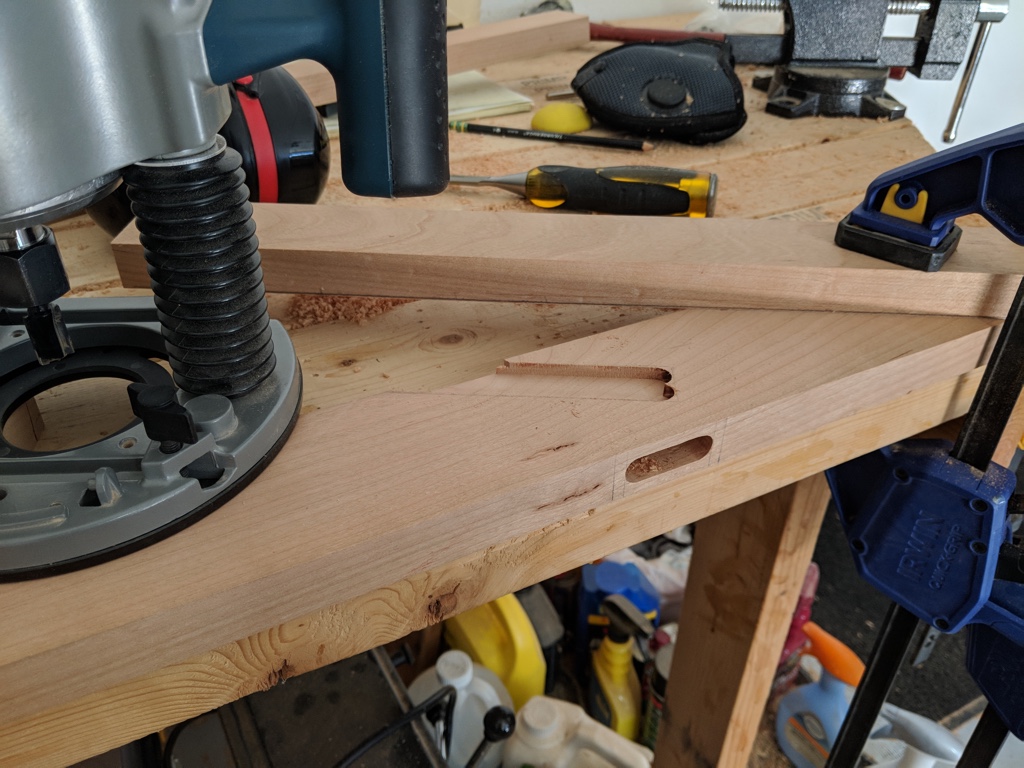
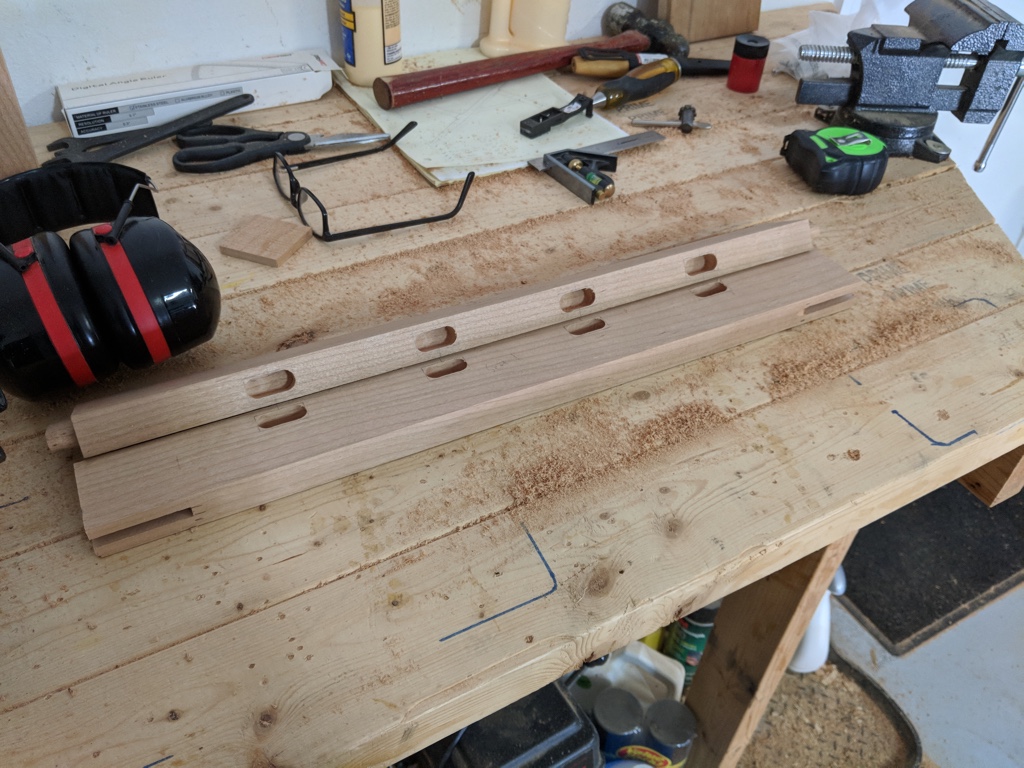
Next I marked the mortises on the main support piece that runs through the chair. I also sketched out where I will need to cut away later on once I get all the joints finalized, to add the distinctive styling of the original chair.
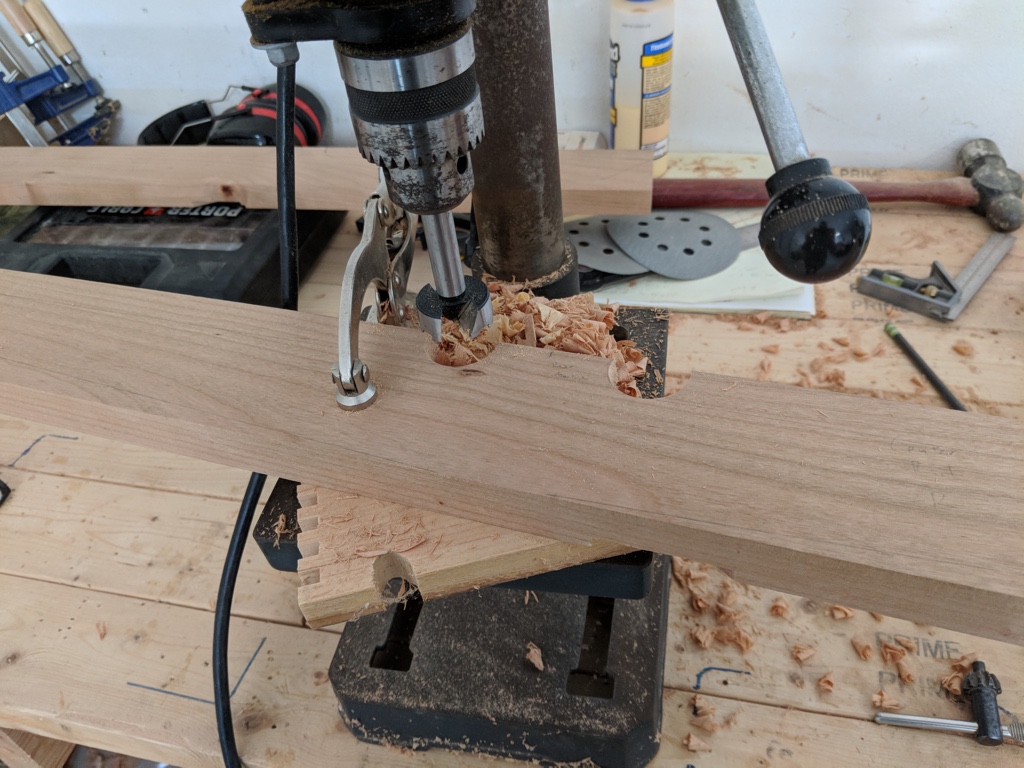
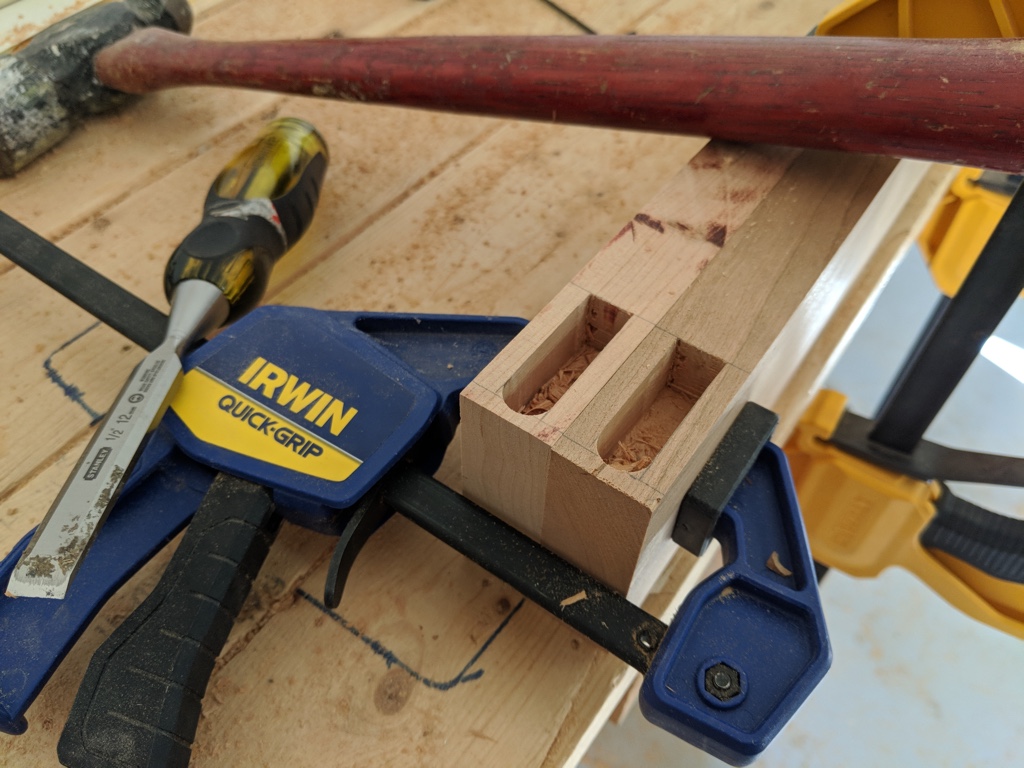
I cut 4 mortises using the router, 2 on each side.

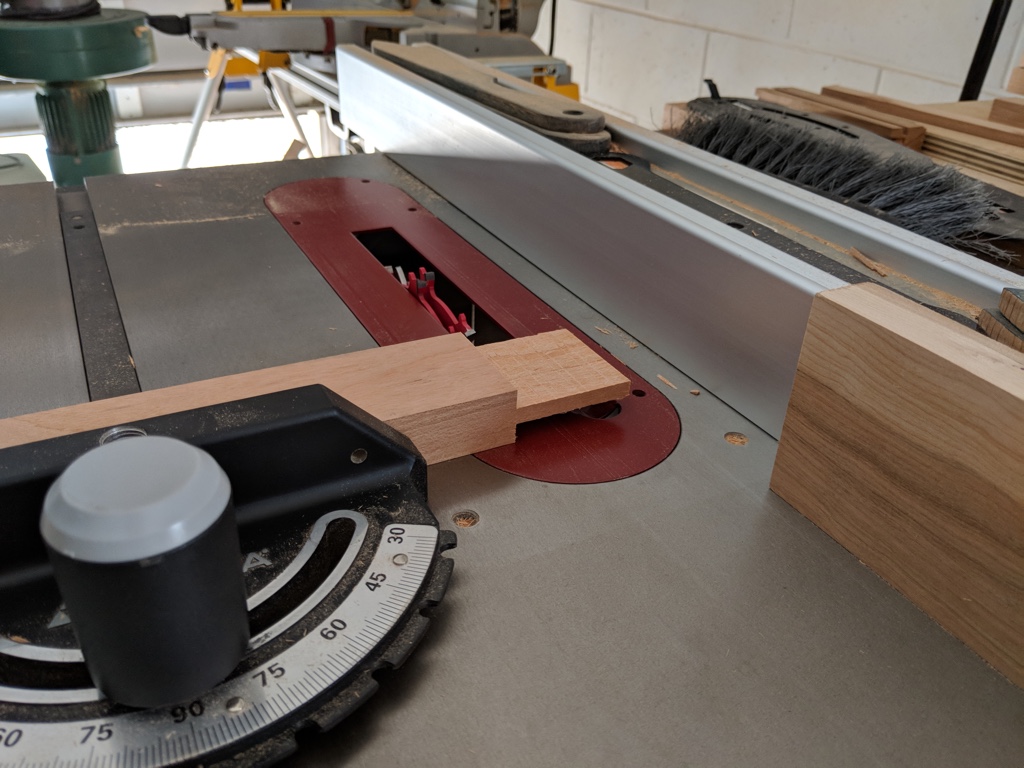
Next I cut the tenons to fit into the mortises. Normally tenons come straight out of the board, since joints typically are at 90 degree angles. The joints on this chair, however, are at 75 degrees, so I had to cut the tenons at an angle.

I'd never done anything like this, but it turned out really well.
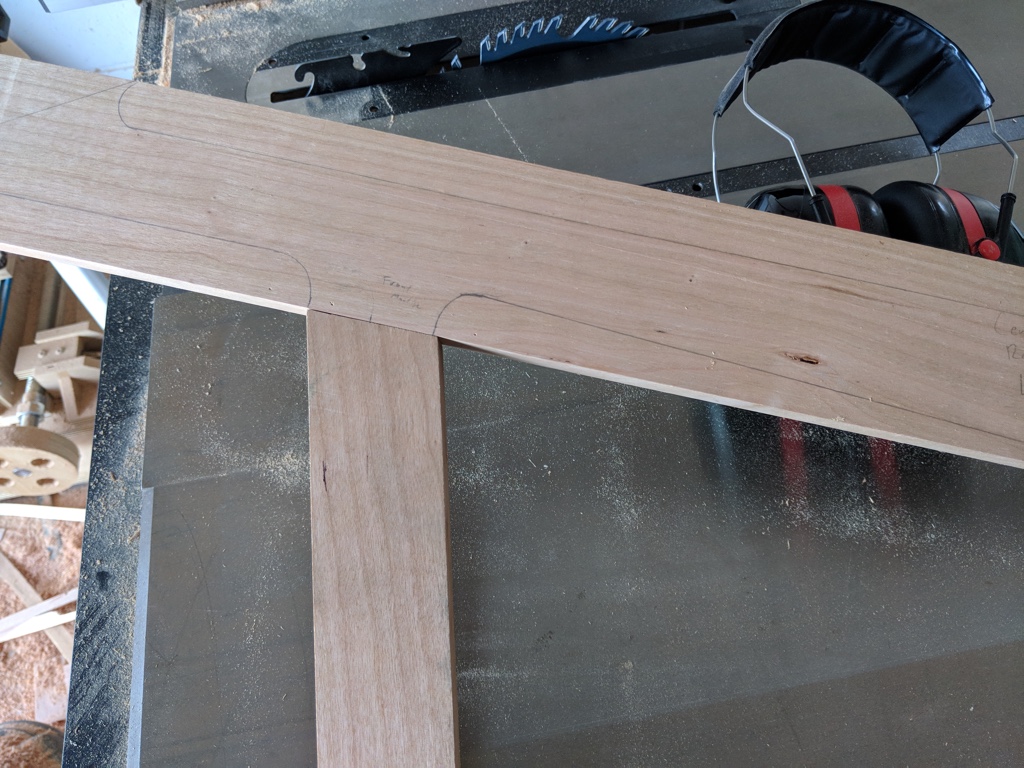
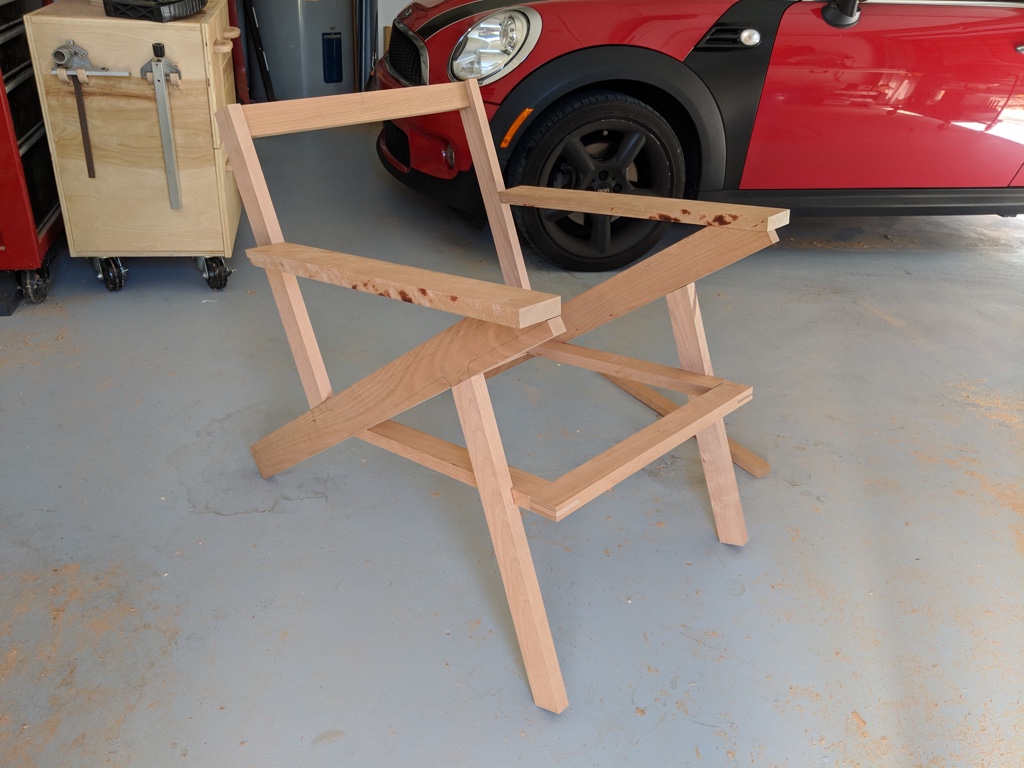
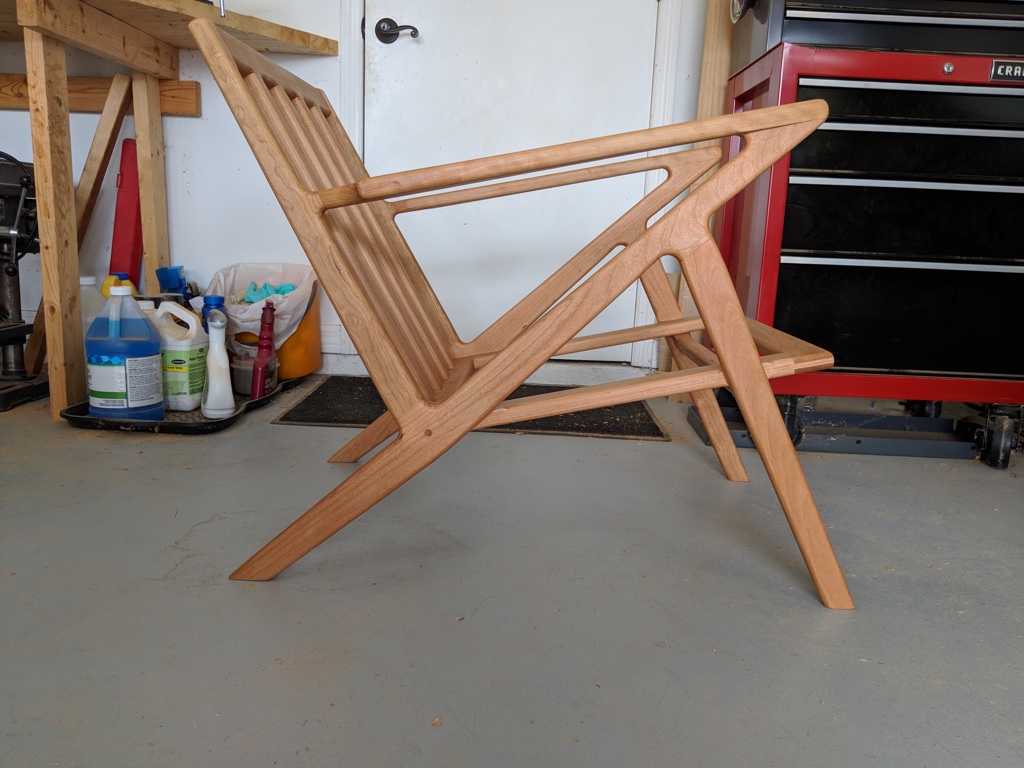
With those joints cut, you can see the Z shape that dominates the look of the chair.
Next I used dowels to attach the arms of the chair both to the rear of the chair as well as to the main support piece. I forgot to take any pictures of this along the way.
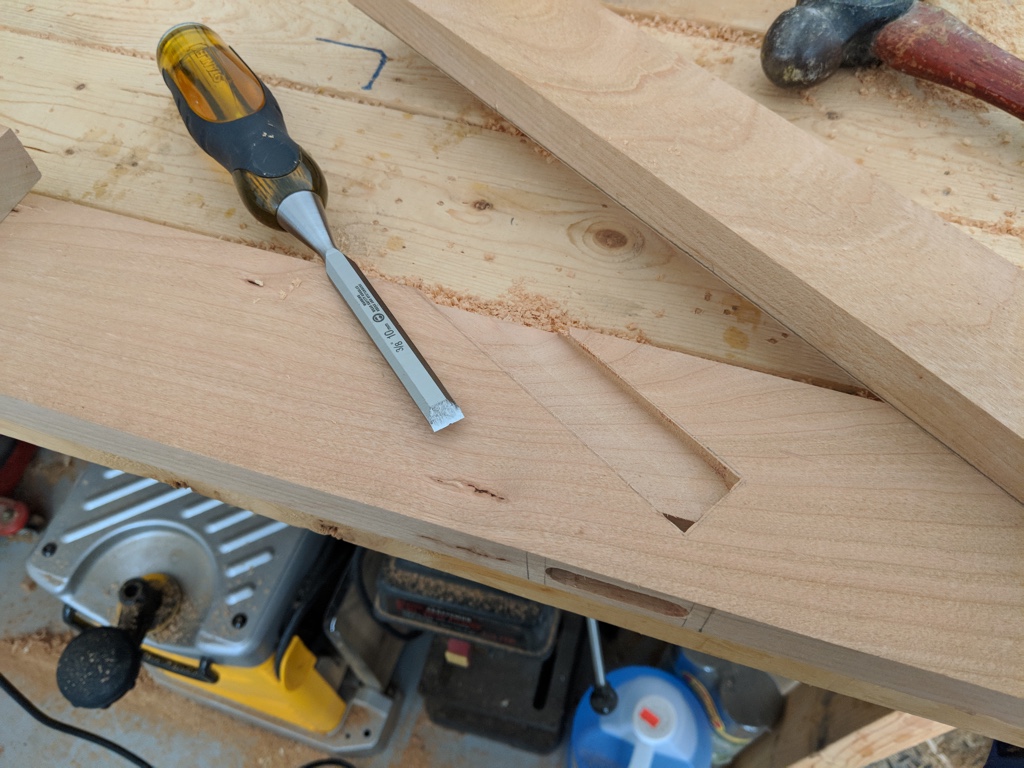
Next I cut out a shallow mortise for the seat to fit into using the router.
Then I squared out the corners of the mortise using a chisel.
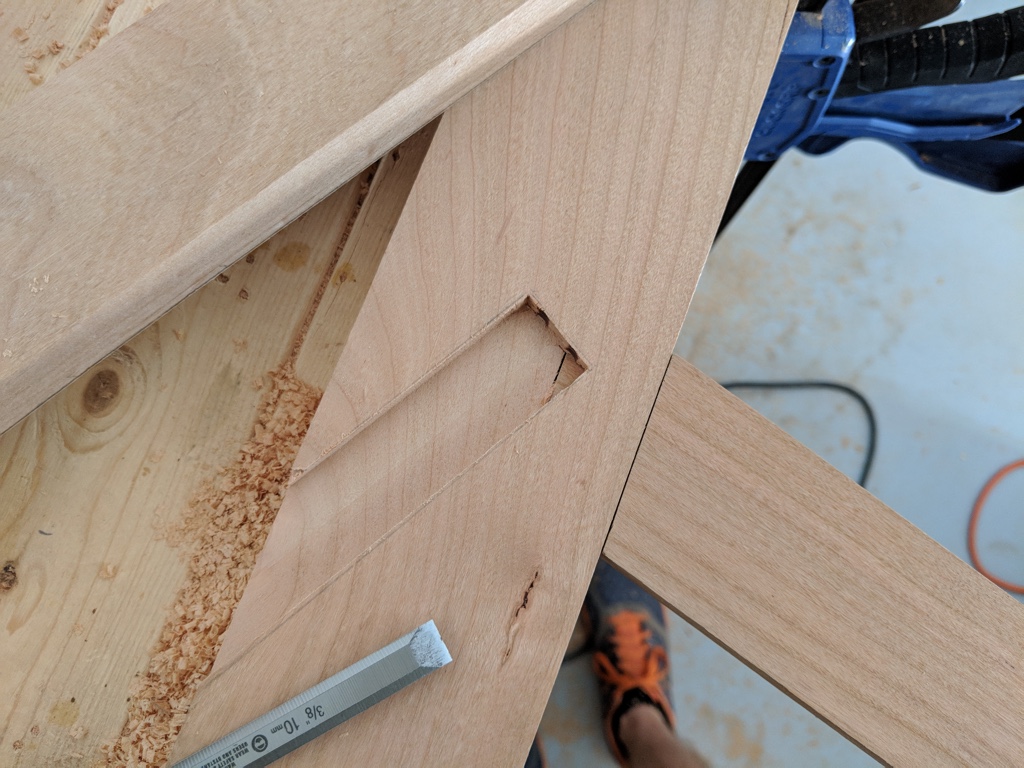
The tenon from the inserted rear support intersects the shallow mortise for the seat, so I trimmed the tenon a bit with the chisel to make sure it wouldn't get in the way of the seat.
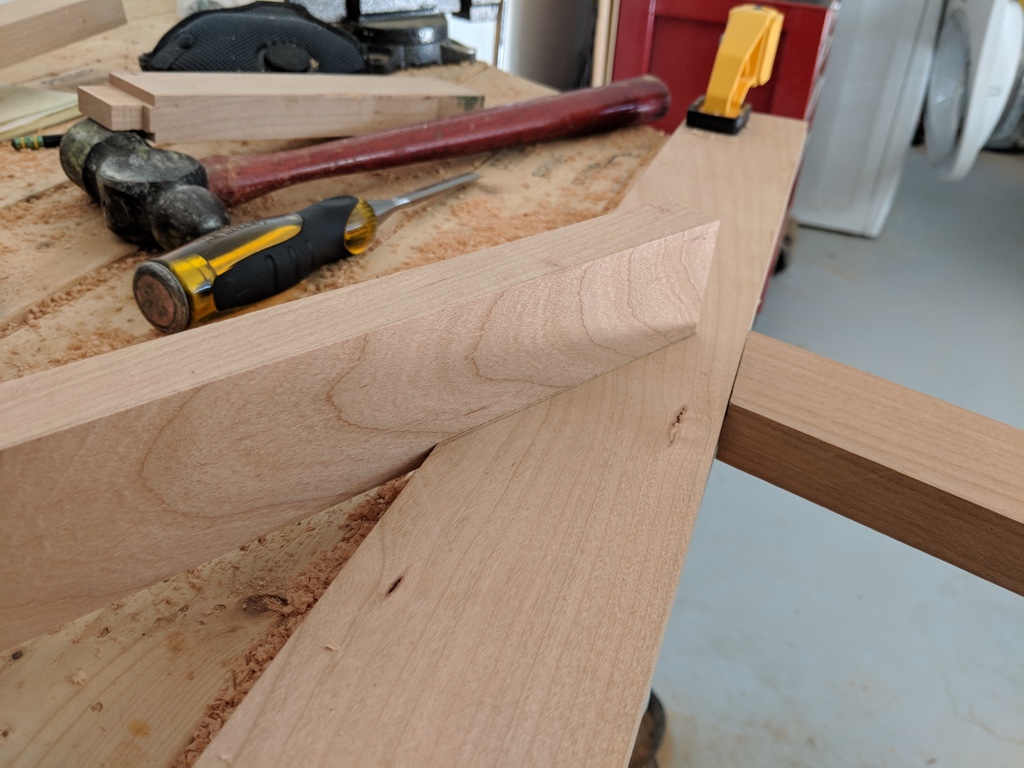
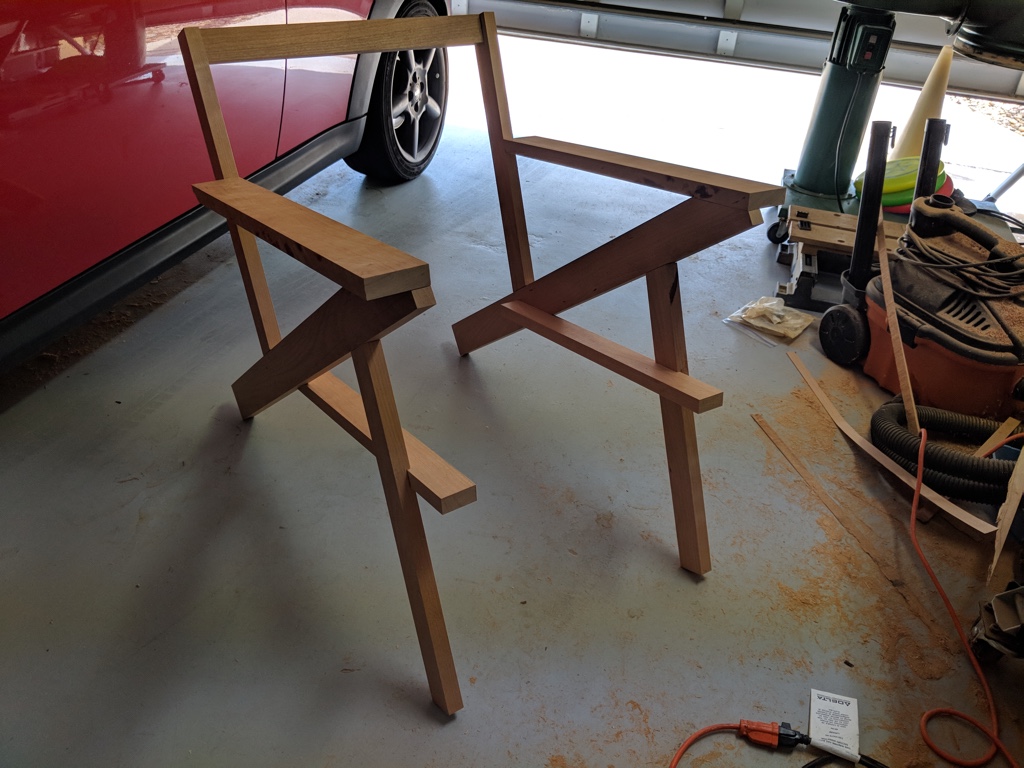
Here's a shot of how it will look once assembled.
The seat support on the front legs was much easier. I just ran them through my dado stack at a 75 degree angle to create a shallow mortise for the seat to sit in.

Next I did a test fit for each seat piece to make sure it fits.
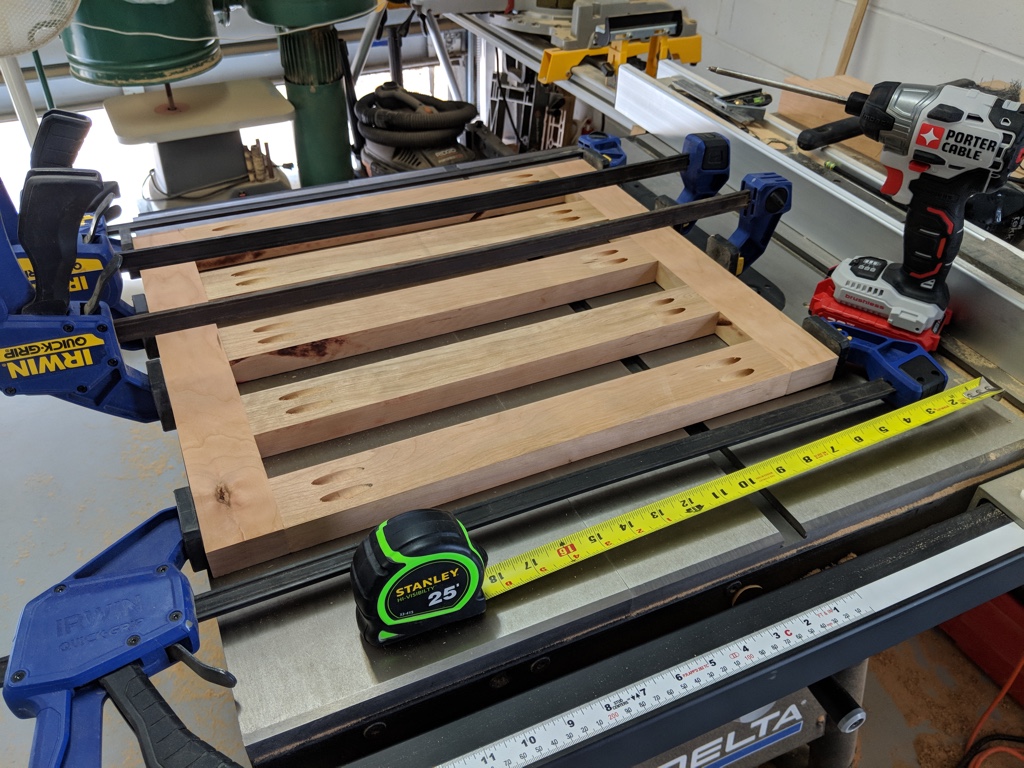
With the seat/frame joint sorted out, I next worked on building the seat itself. First I cut a groove into the end of two of the seat pieces. I put tape across the wood in an attempt to minimize chip out on the back side, but it didn't really work.
On the other two seat pieces I cut the opposite shape, leaving a third of the board in the middle.
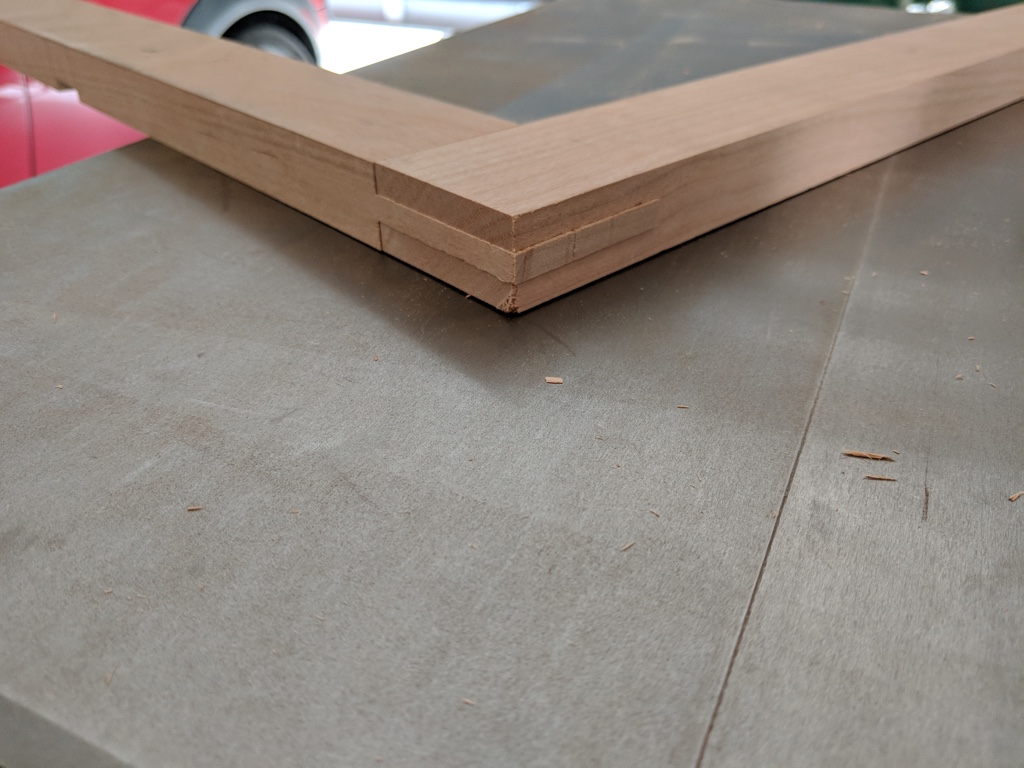
The resulting bridle joint fit very well.
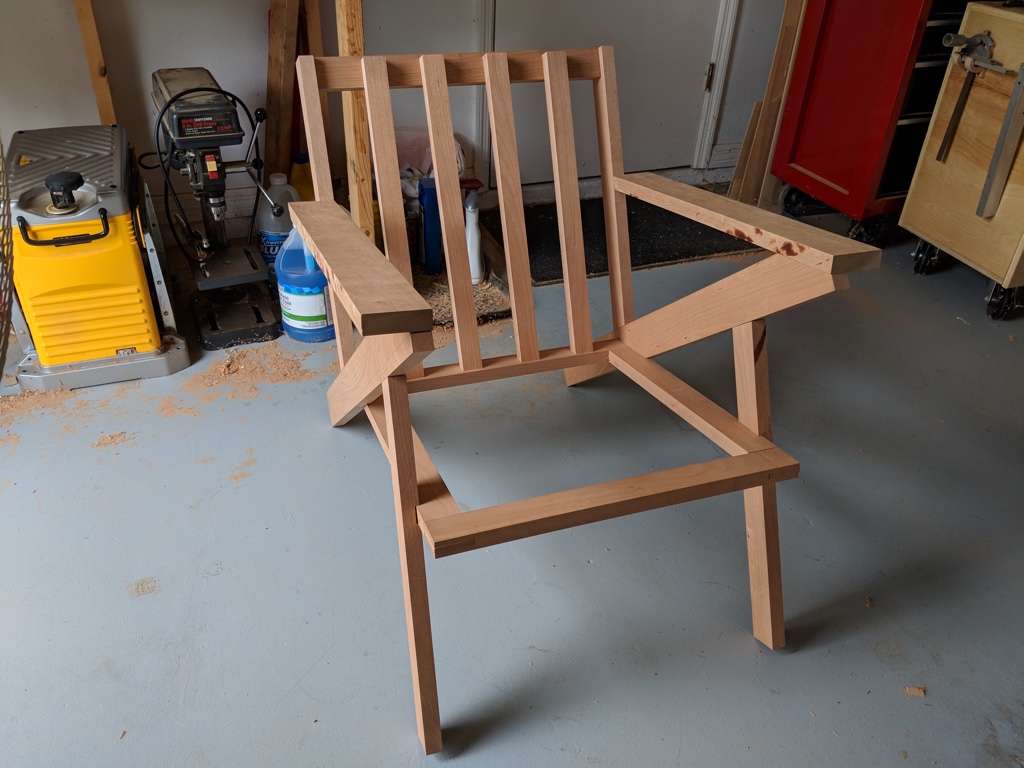
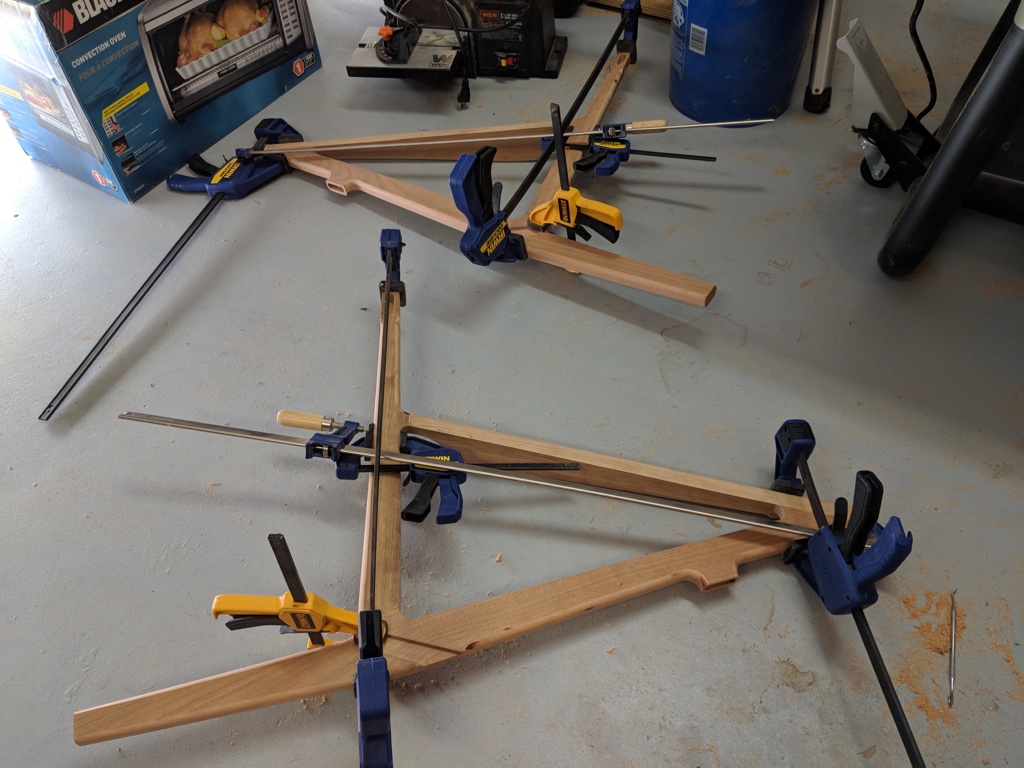
Next I did another dry fit to see how everything was looking.
I then cut four narrow slats to provide back support. Here they are just laid on the chair to visualize whether four was the right number, or if I wanted more or less. I stuck with four.
Next I cut mortises for the back slats. I used to stress over cutting mortises with the router, but now I've done it enough that I can do them pretty quick and consistently.
Then I did another dry fit with the rear slats in place.
Next I glued the seat frame together since I wasn't going to change it any further.
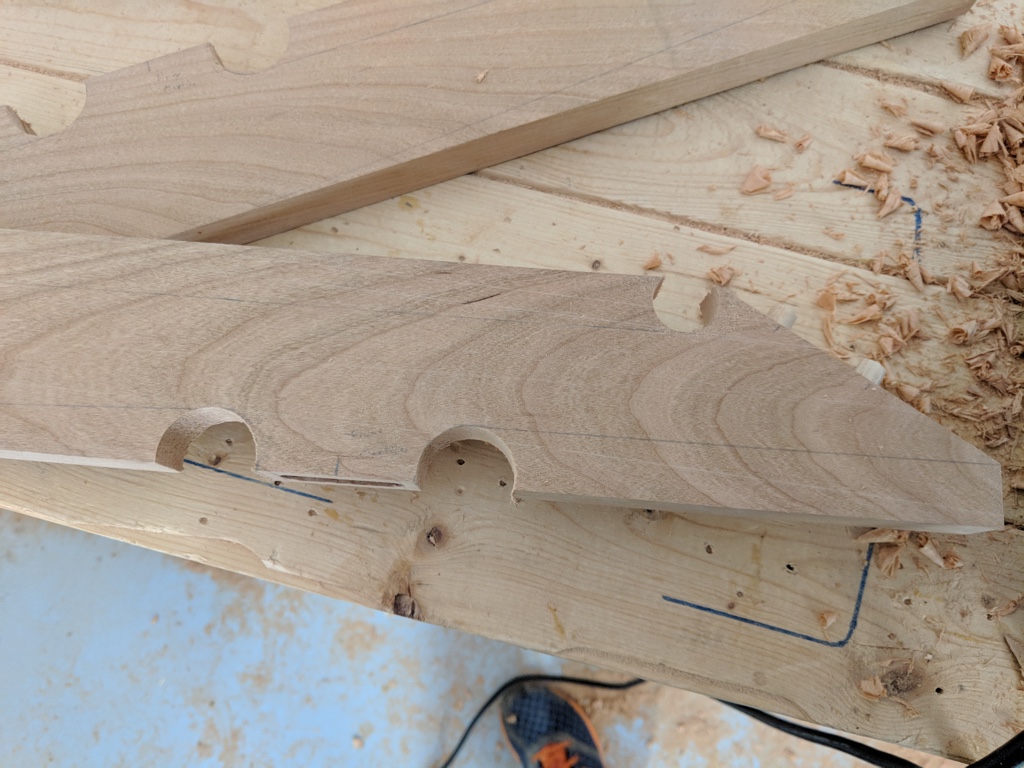
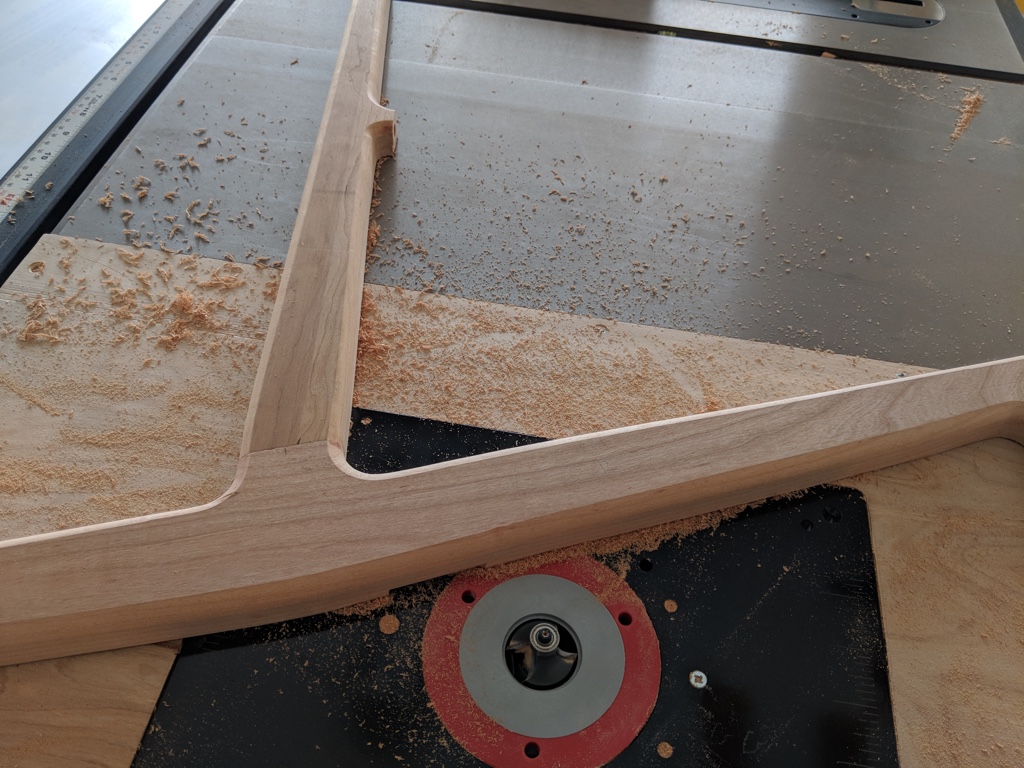
I then started shaping the pieces of the chair, using forstner bits to cut out curves near the mortises.
Here's another shot of the circular pieces I cut out. I then cut along the pencil line to trim the central rail to its final shape.
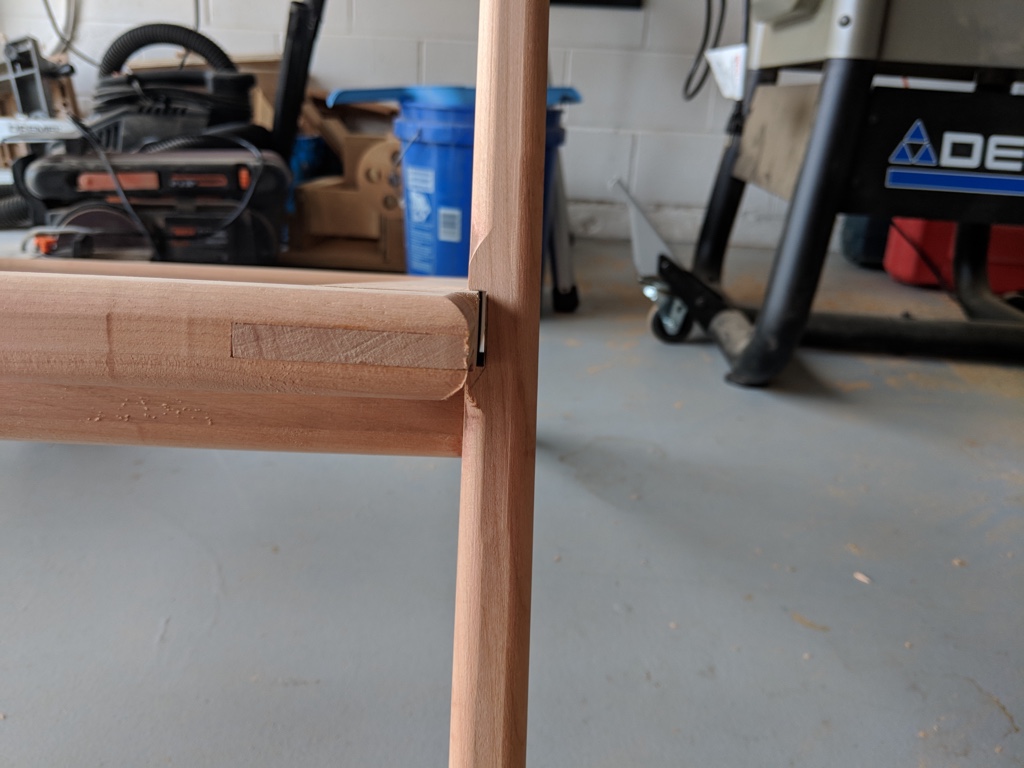
After a lot of trimming and sanding, the chair was starting to take on the curvy nature of the original chair. Unfortunately, in my haste to finish for the day, I trimmed off the piece that was supposed to protrude from the rear support to the arm, leaving a gap between the two. :'(
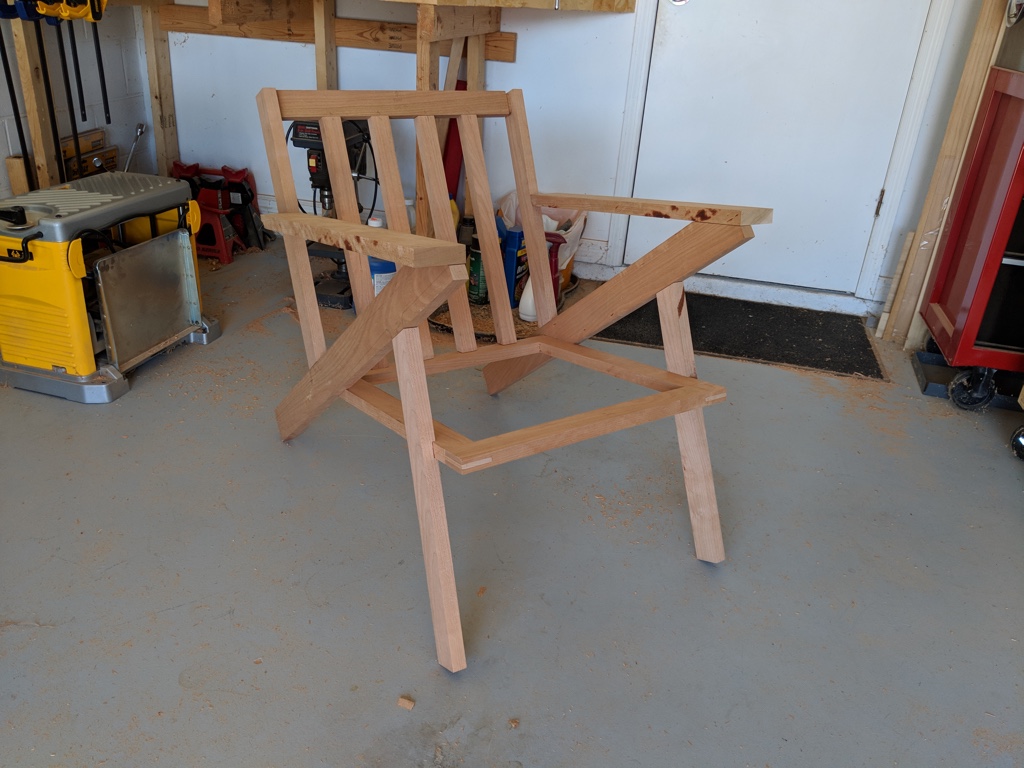
It set me back a few hours, but I re-cut the back support pieces and added the necessary joinery (tenon on one end, mortise on the other, dowel hole for the arm) and cut the curves where it would attach to the arm. I did another dry fit to make sure the new pieces worked out.
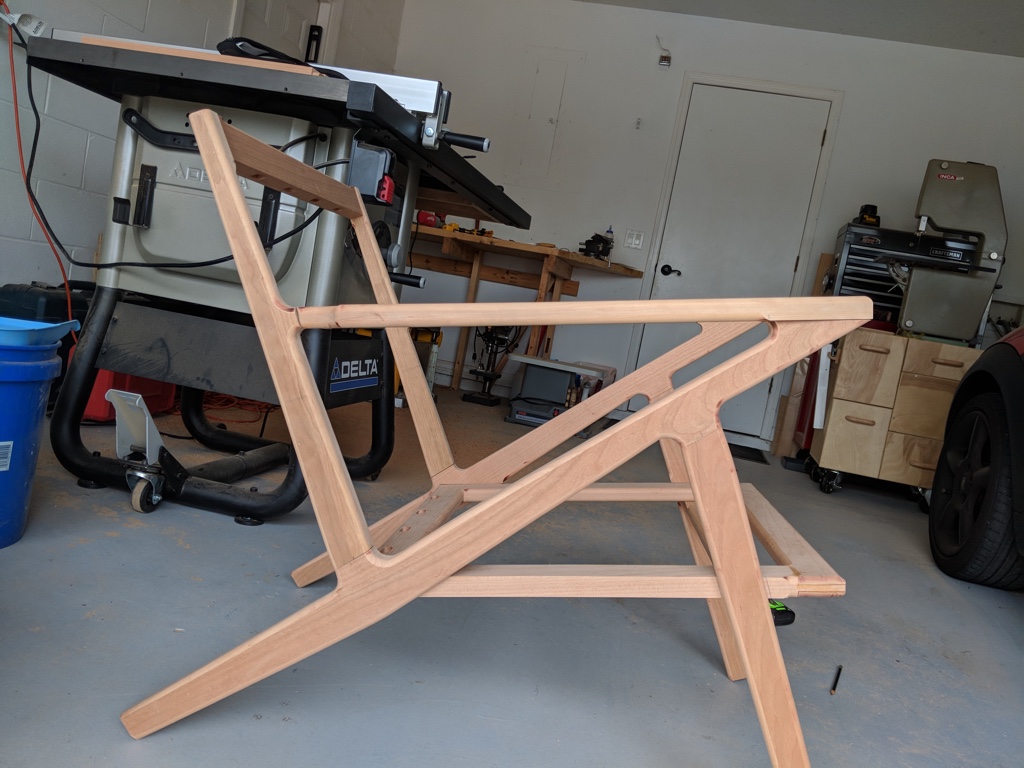
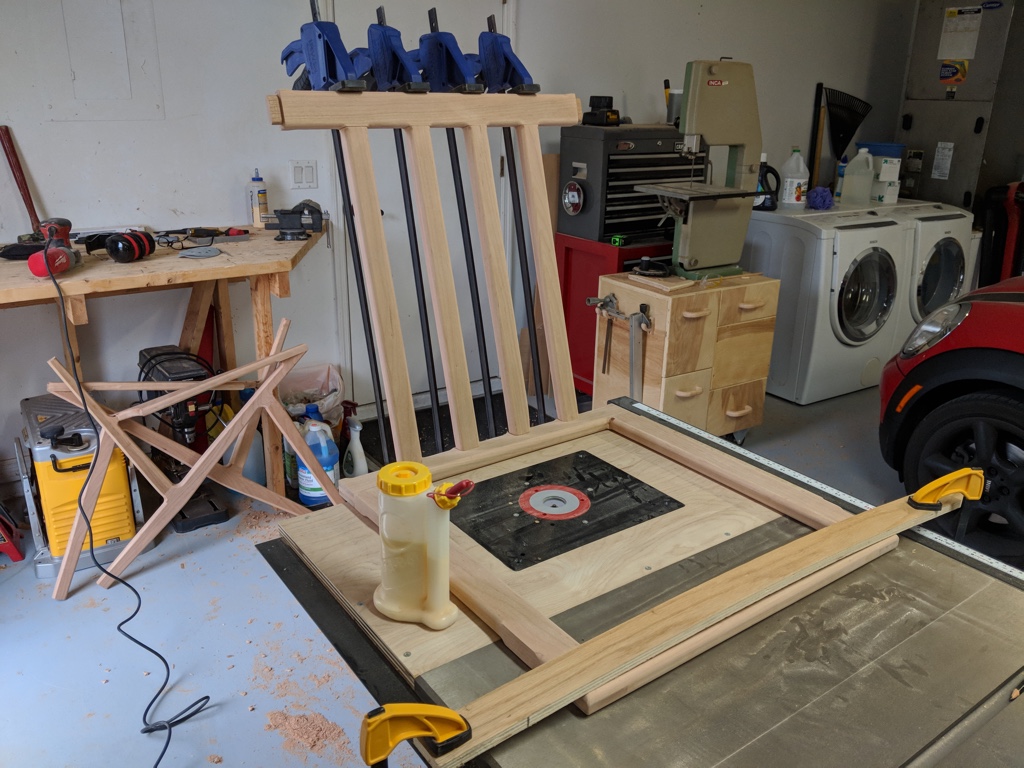
Next I started rounding over the sharp corners with a roundover bit on the router table.
Along the way, I decided to add a support brace under the front of the seat to add more structural integrity, but I cut it a bit too long, so there was a small gap. Easy enough to fix.
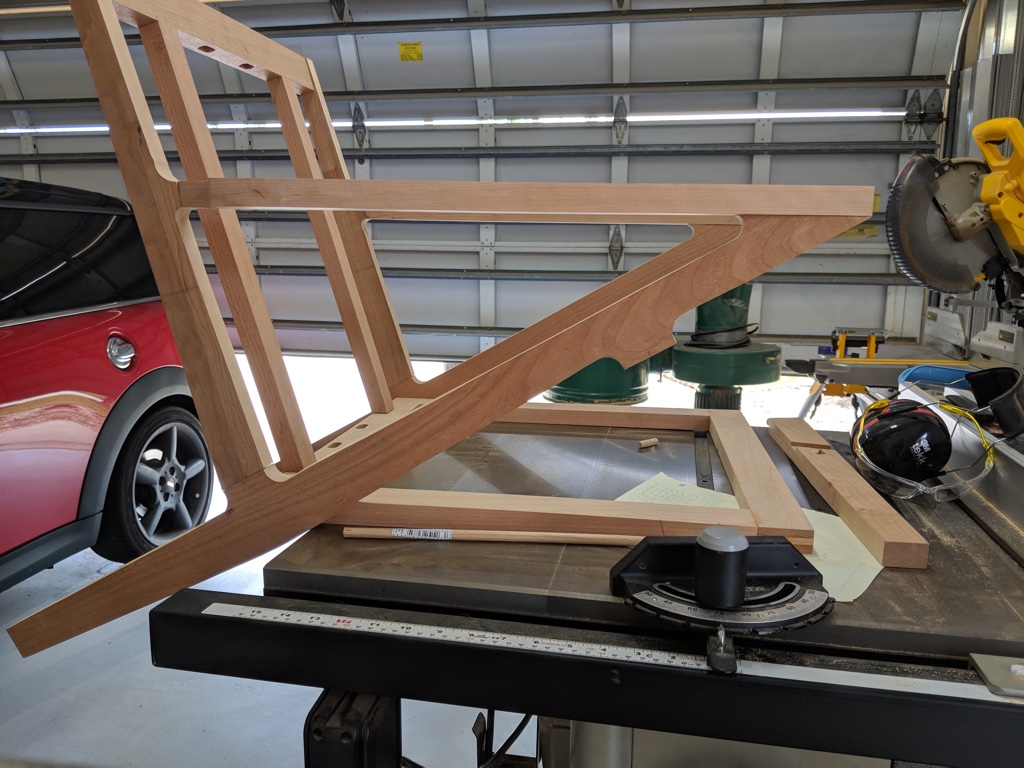
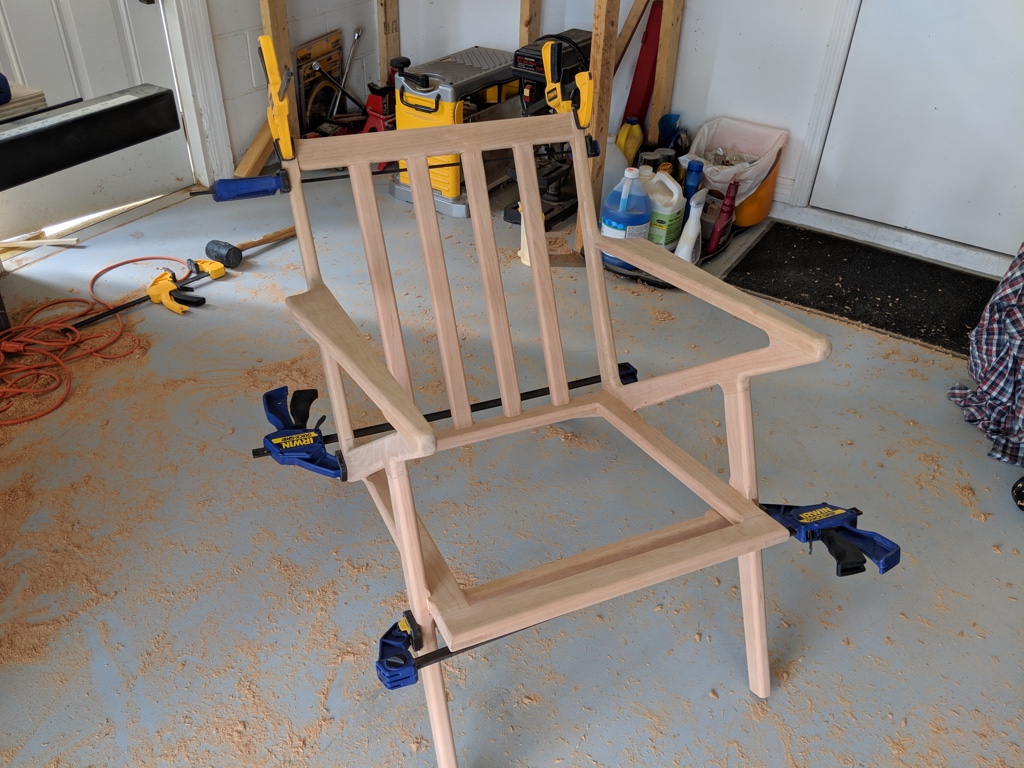
One last dry fit to make sure everything fits.
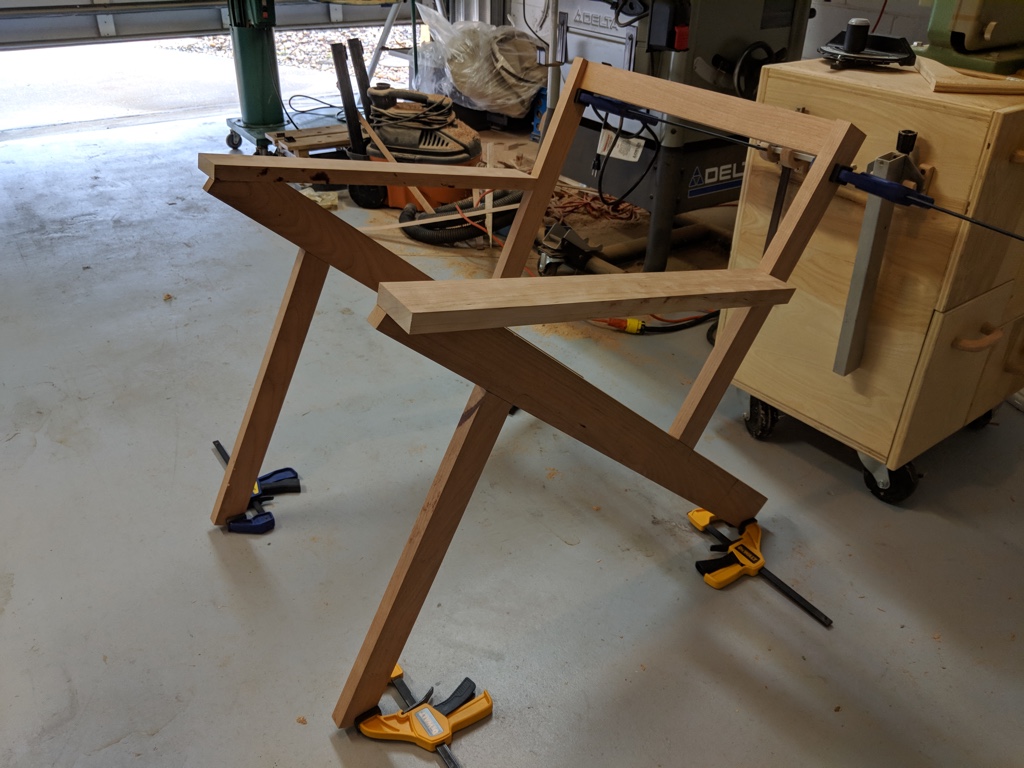
First I glued up the arm/rear support/center rail triangles, as they provide the bulk of the strength and are the most awkward to clamp.
Next, I sanded up the seat and rear slats and then glued them all together into one assembly. You can see the finished side assemblies in the background.
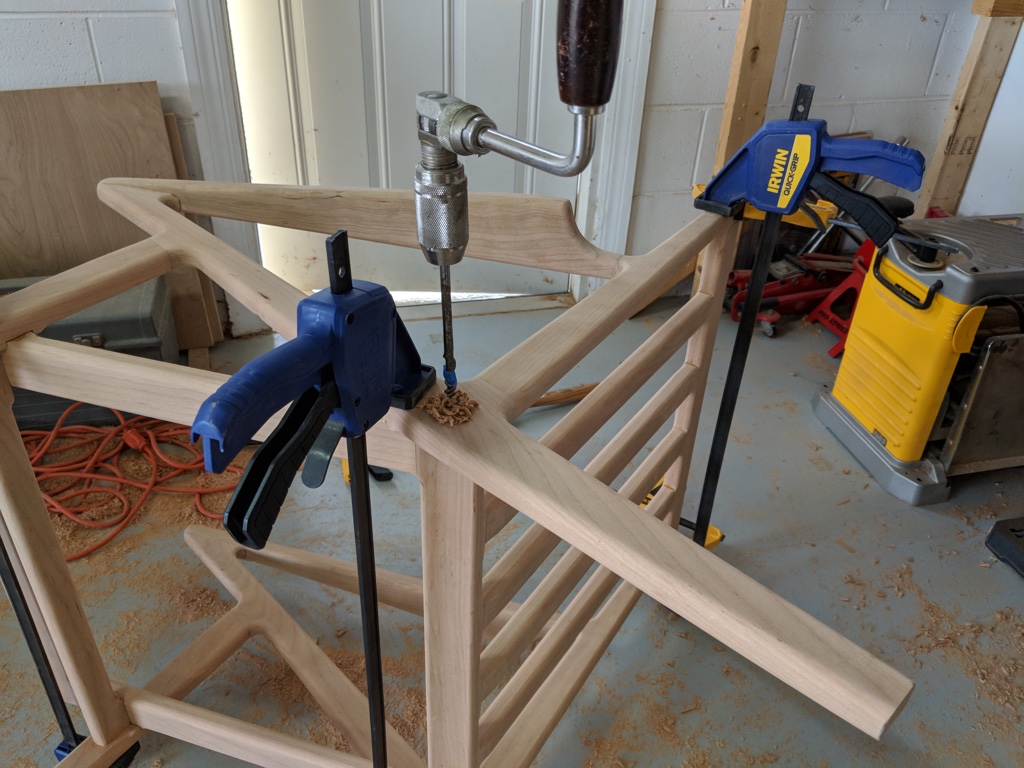
Finally I glued and clamped all the pieces together. Final glue-up is always the best/worst time of the whole project, because it's satisfying to piece everything together permanently but also incredibly frustrating since you're working against the clock before the glue sets.
I was worried about stability of the rear seat since it's just sitting in a 1/4" mortise, so I added dowels to each side to hopefully hold it in place.
Here's a picture of it all sanded up and ready for finishing.
I finished it with tung oil like nearly all my projects. It really makes the cherry wood shine.

I love the repeated parallel lines of the chair and the curved joints.
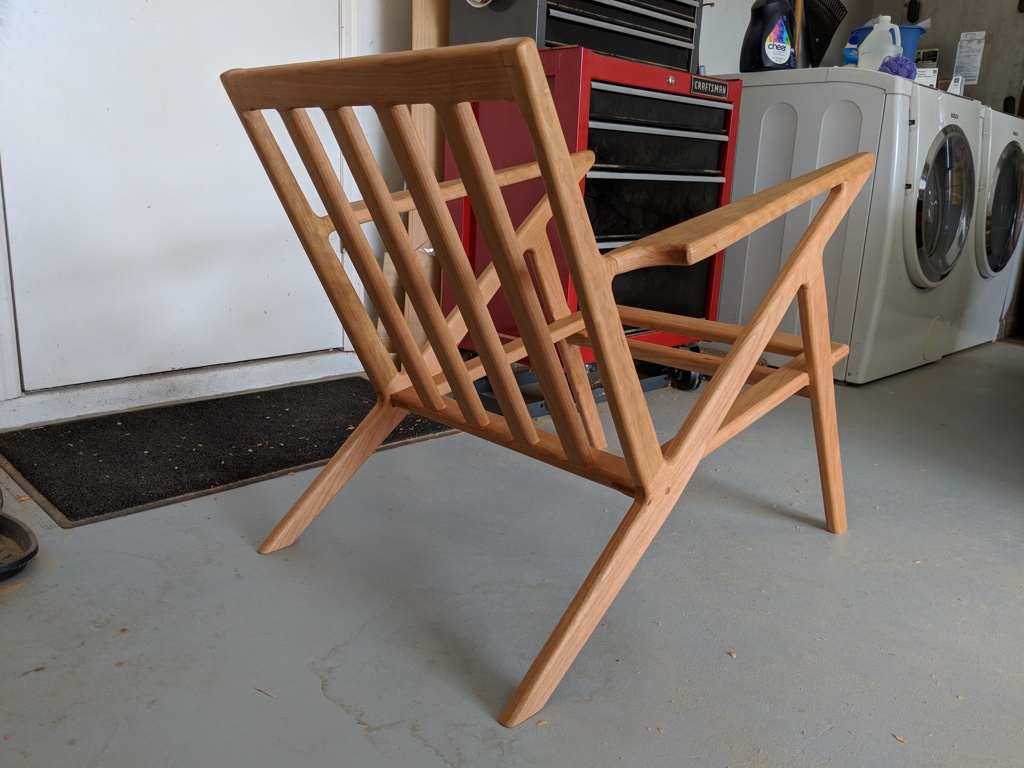
Here's a shot of the back.
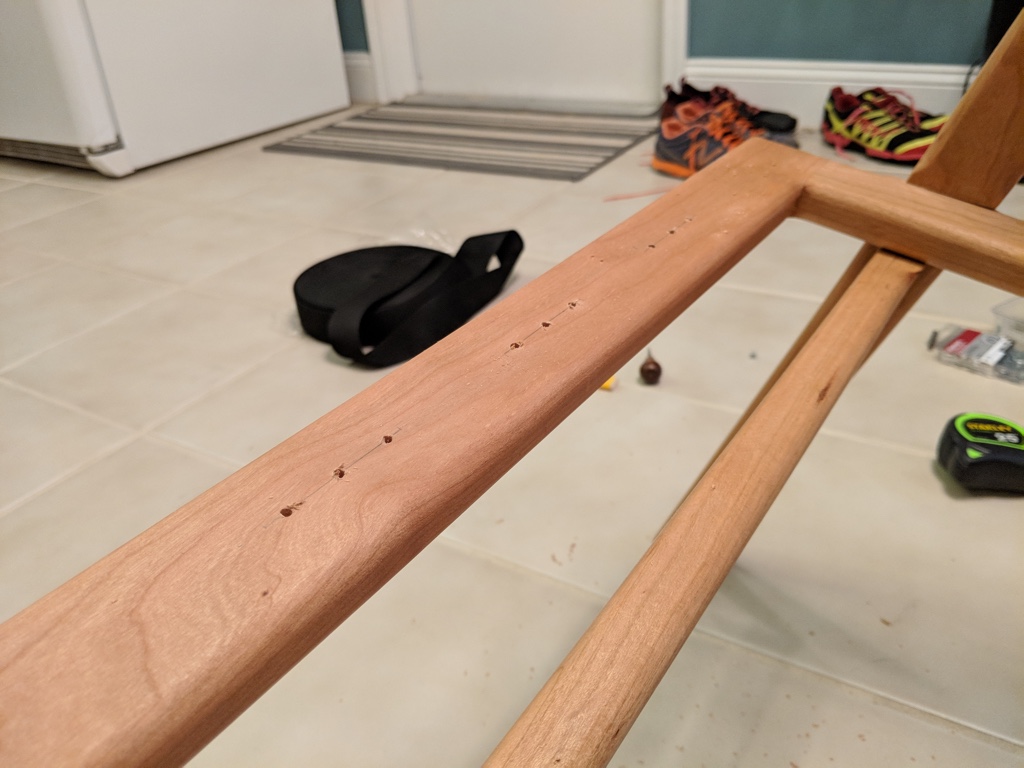
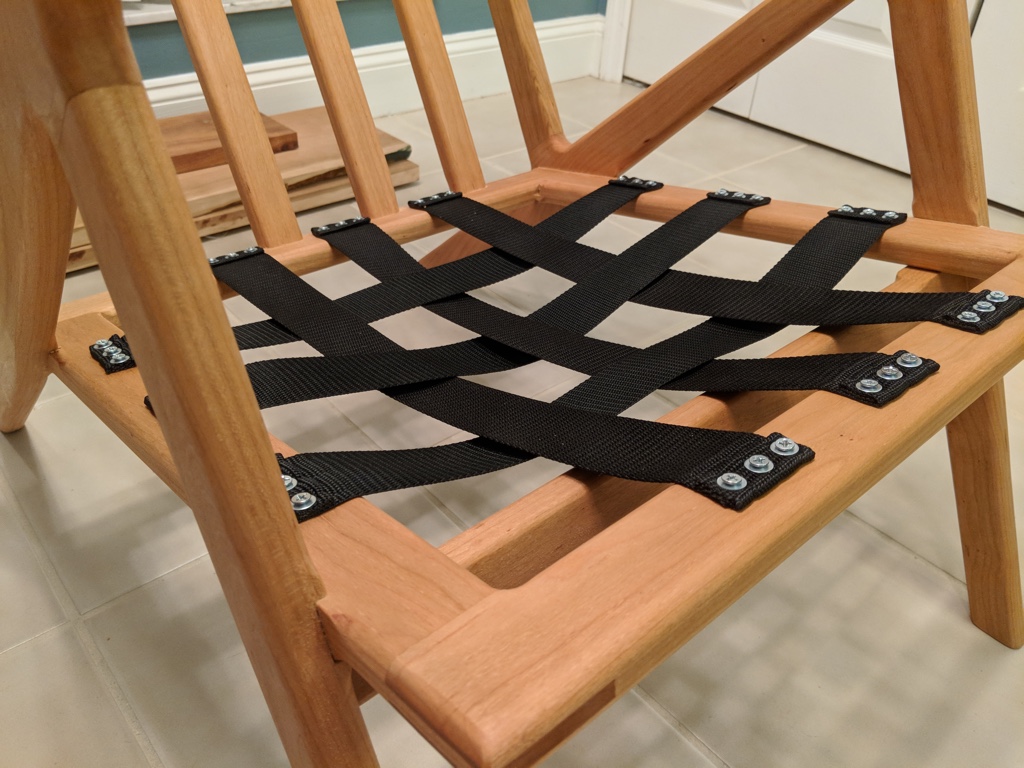
For the seat, I added nylon strapping to provide support for the cushion but also be forgiving. Here are the pilot holes I drilled to attach the straps.
I left the straps fairly loose, but may need to tighten them up later if there's too much sag.
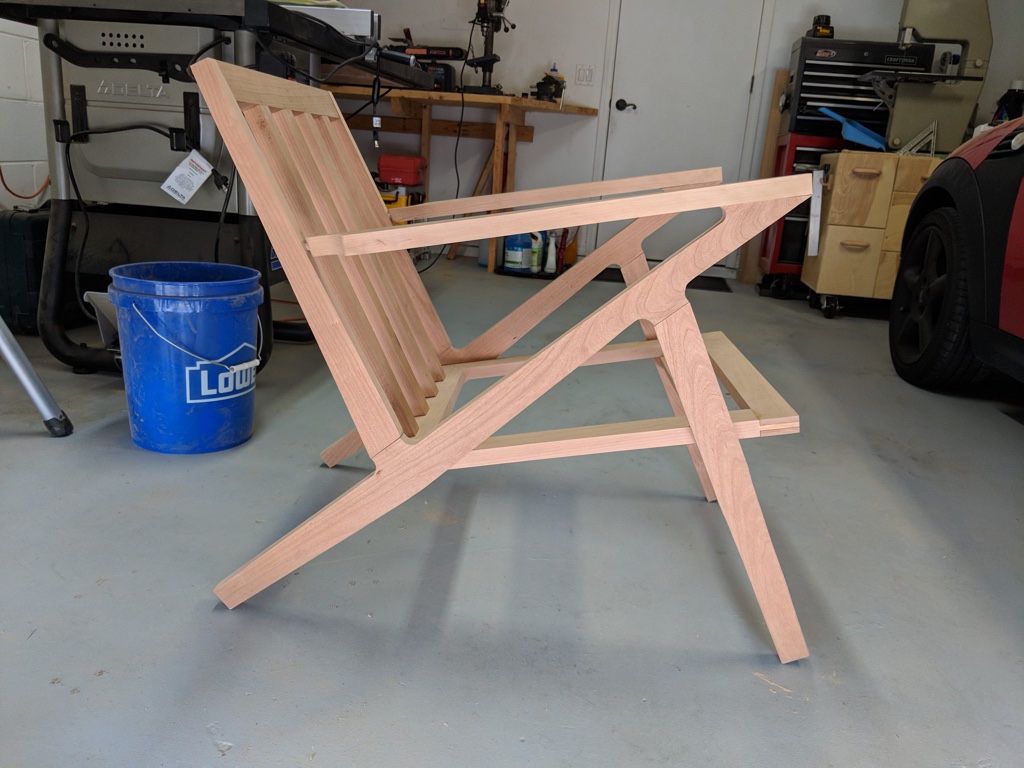
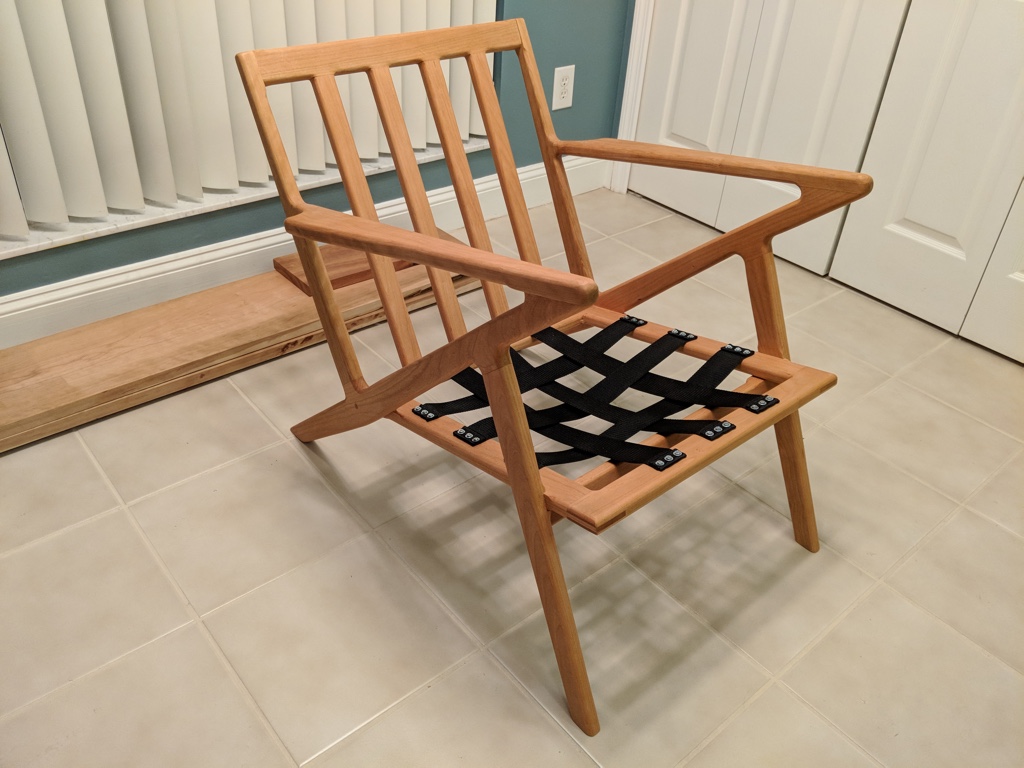
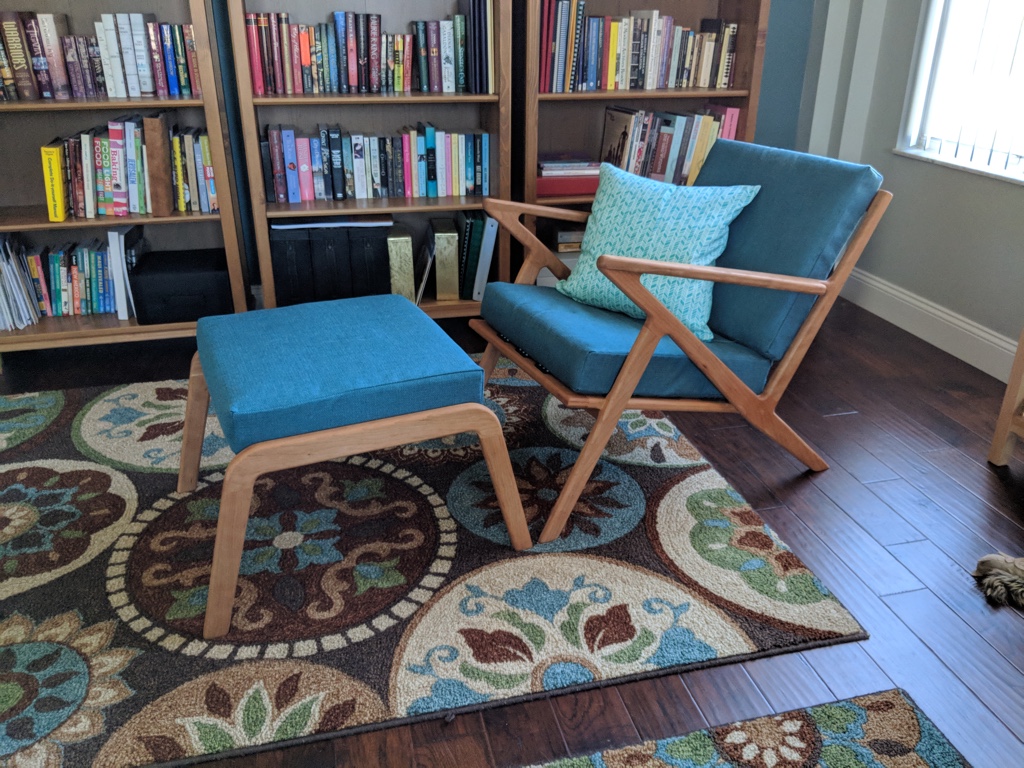
Here's the nearly final result. Carrie made some cushions for it that look really good (more on that later).
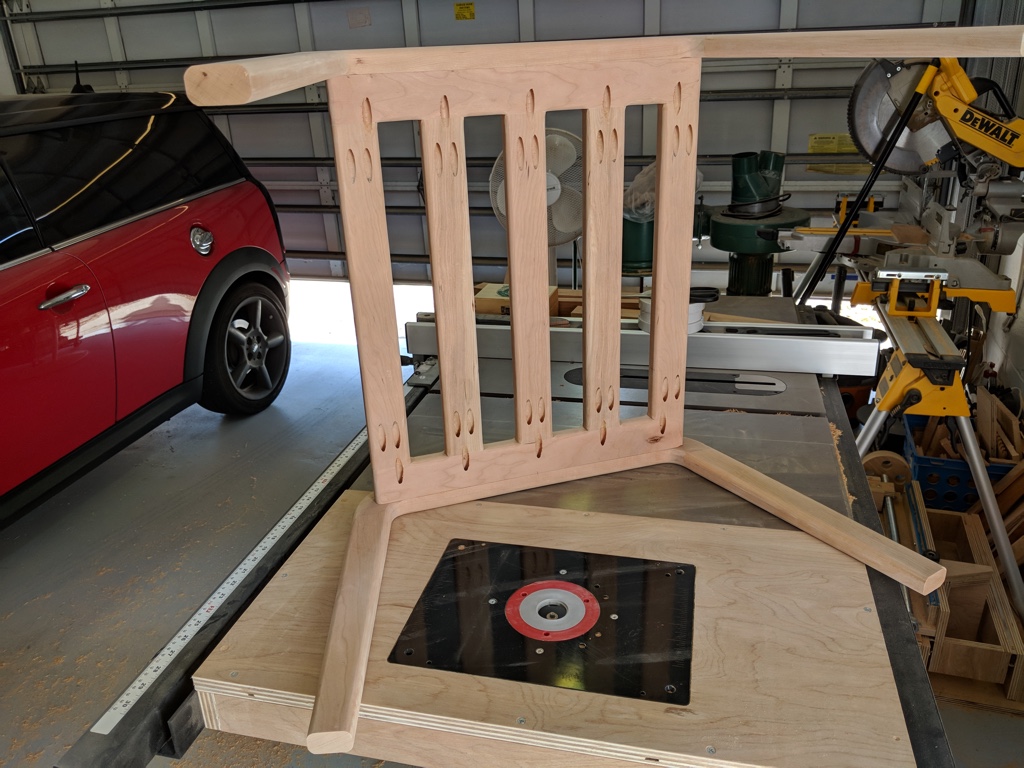
Next I made an ottoman to go with the chair using leftover cherry wood. I didn't take a ton of pictures along the way, because it wasn't terribly exciting, but on the other hand I knocked it out in 2 days, which was nice after the many many hours spent on the chair.
I used pocket screws to hold the frame together since no one will see the underside and it's much quicker. Also I just bought a new Porter Cable drill set to replace my 10-year old Dewalt and its sad batteries, and pocket holes were a good excuse to try it out.
I did mortise and tenon joints on the legs because I didn't want any holes showing from the pocket holes. I usually round over the tenons, but this time I squared out the mortises to try something new. I'd say it's six of one, half dozen of the other. They're both kind of tedious.
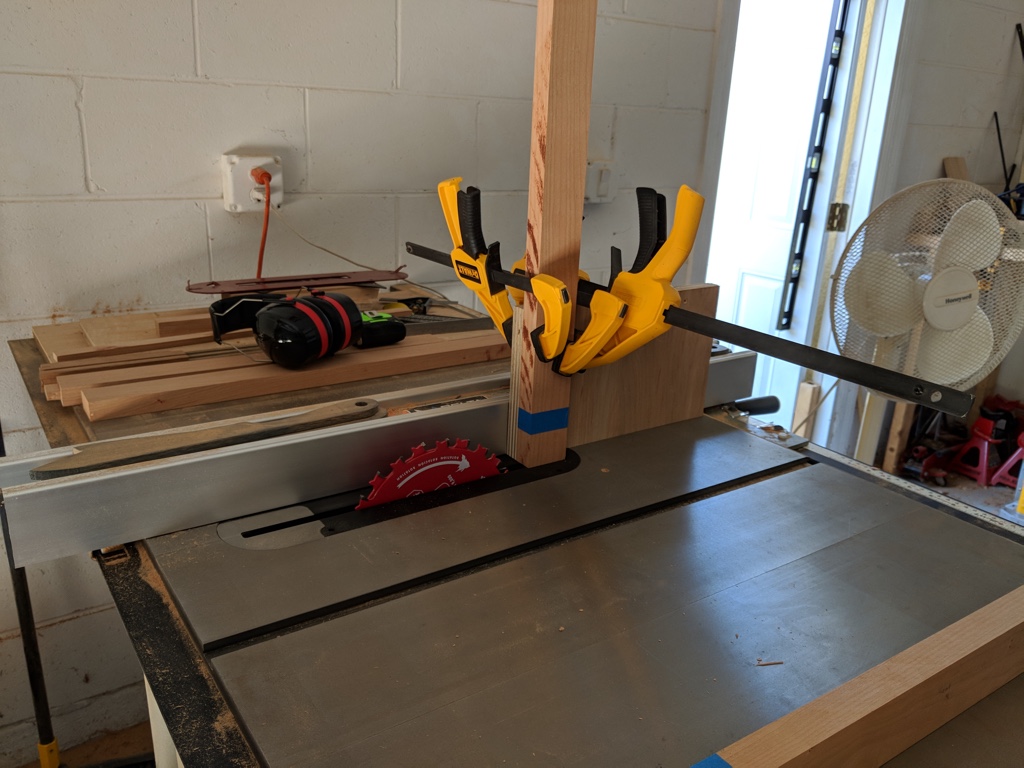
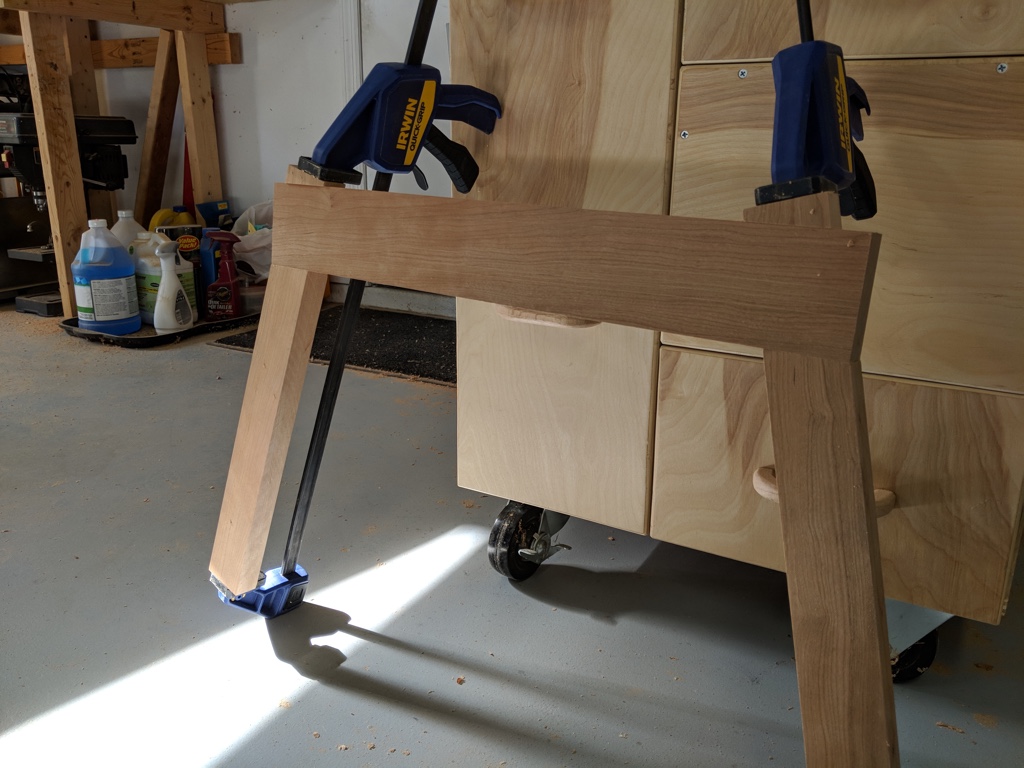
Clamping wasn't working that well due to the 75 degree attachment angle, until I realized I could use the cut off end to square up the clamp.
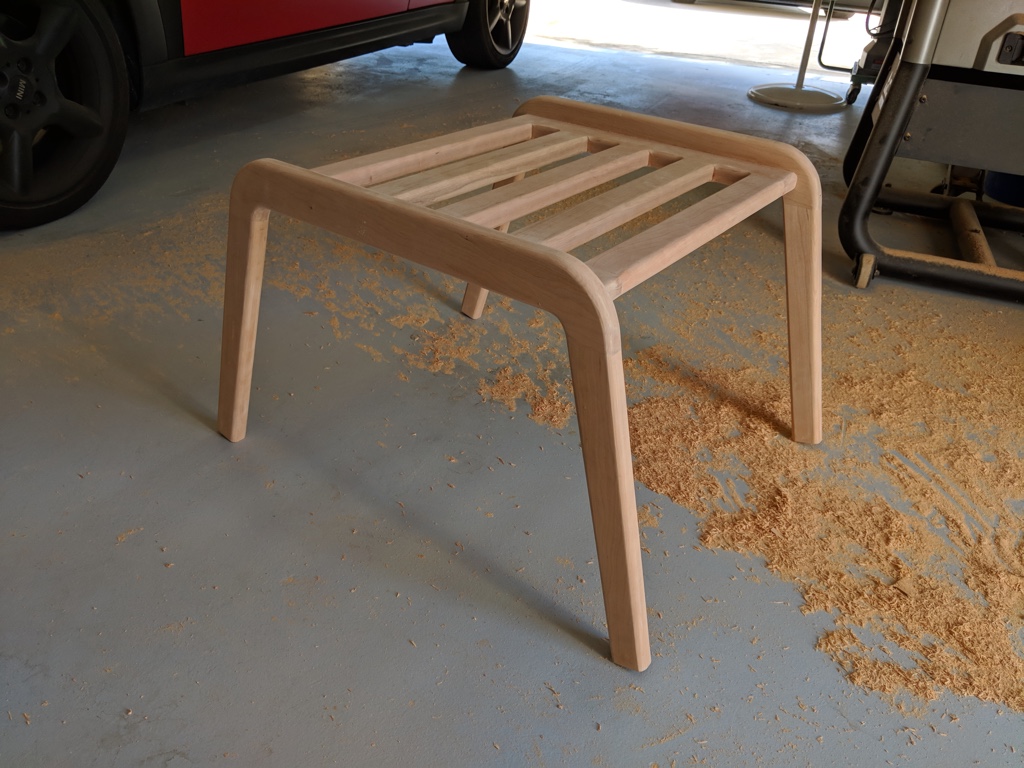
The underside is kind of a mess, but whatevs, no one will know but me. (And maybe my dad, since he might inspect it next time he visits.)
It turned out pretty well, even though it wasn't a very challenging project.
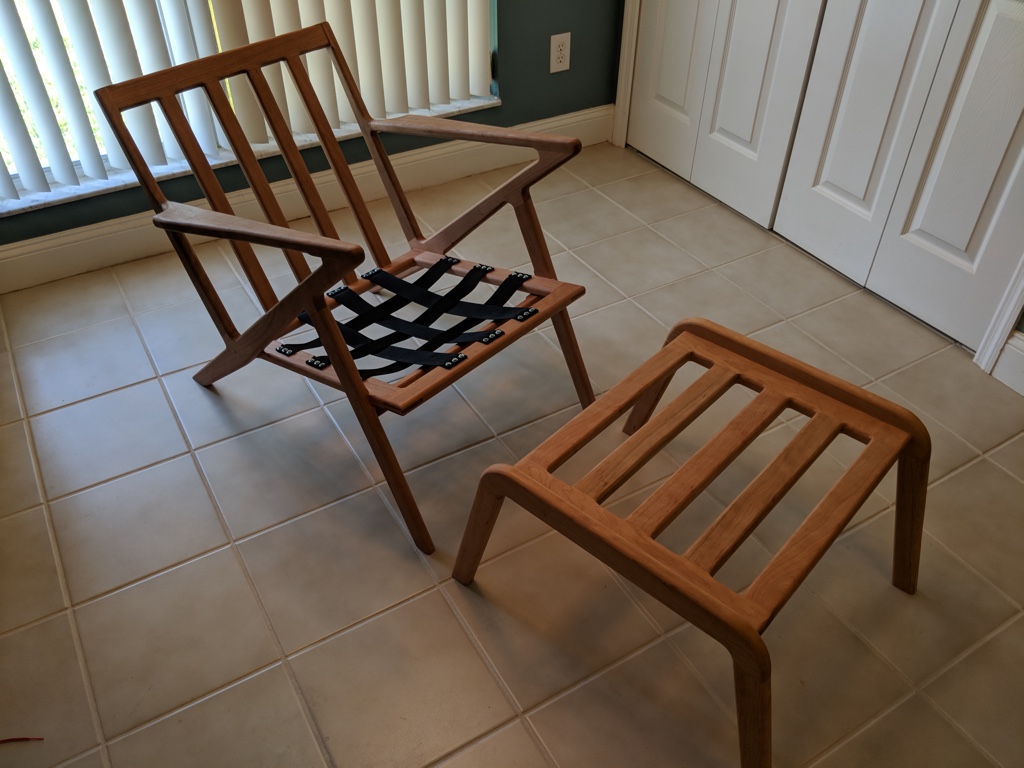
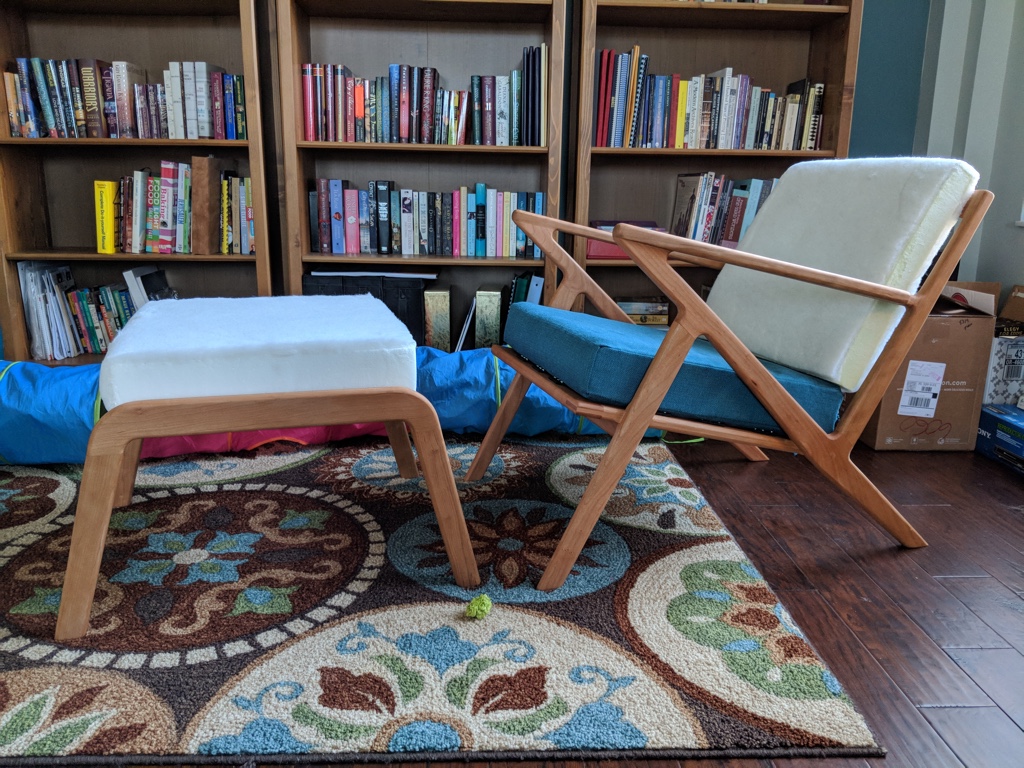
Here it is next to the chair.

It took a few weeks to get the foam in, but after it finally showed up, Carrie made matching cushions for the chair and ottoman. Here's a few pictures along the way.
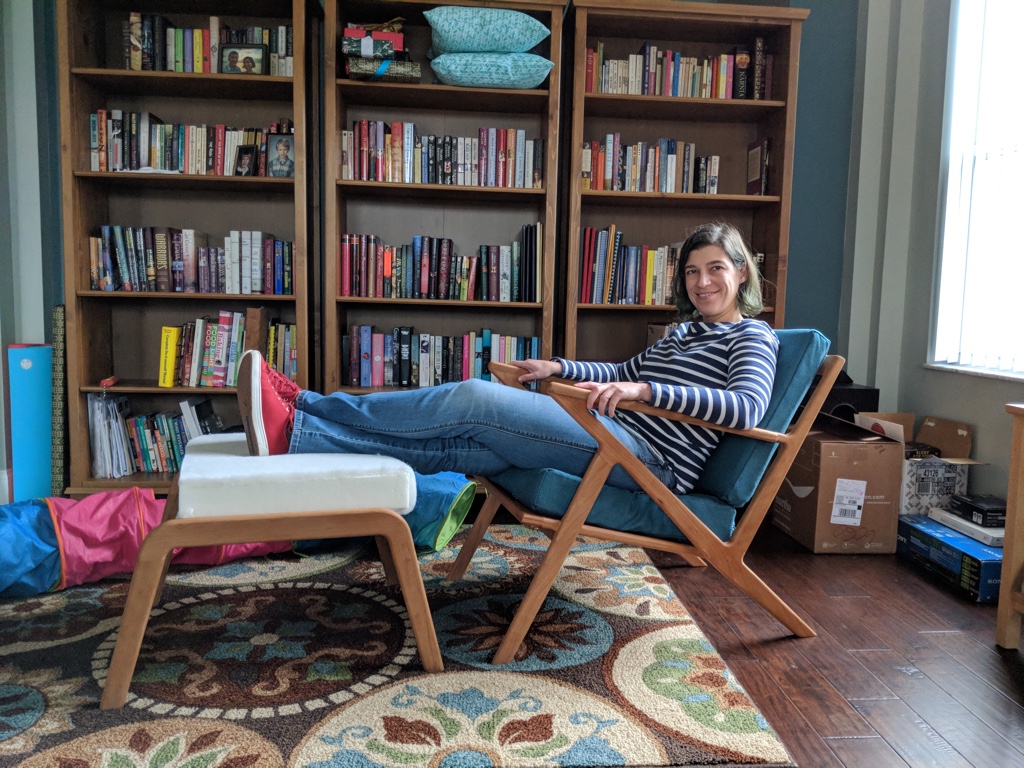

It's pretty comfy to sit in, which was a nice surprise. I was fully expecting it to be uncomfortable based on a similar chair I sat in at Crate & Barrel.