I've been building a miter saw station using these plans for the past few weeks, and it's finally done. Here's a few pictures along the way.
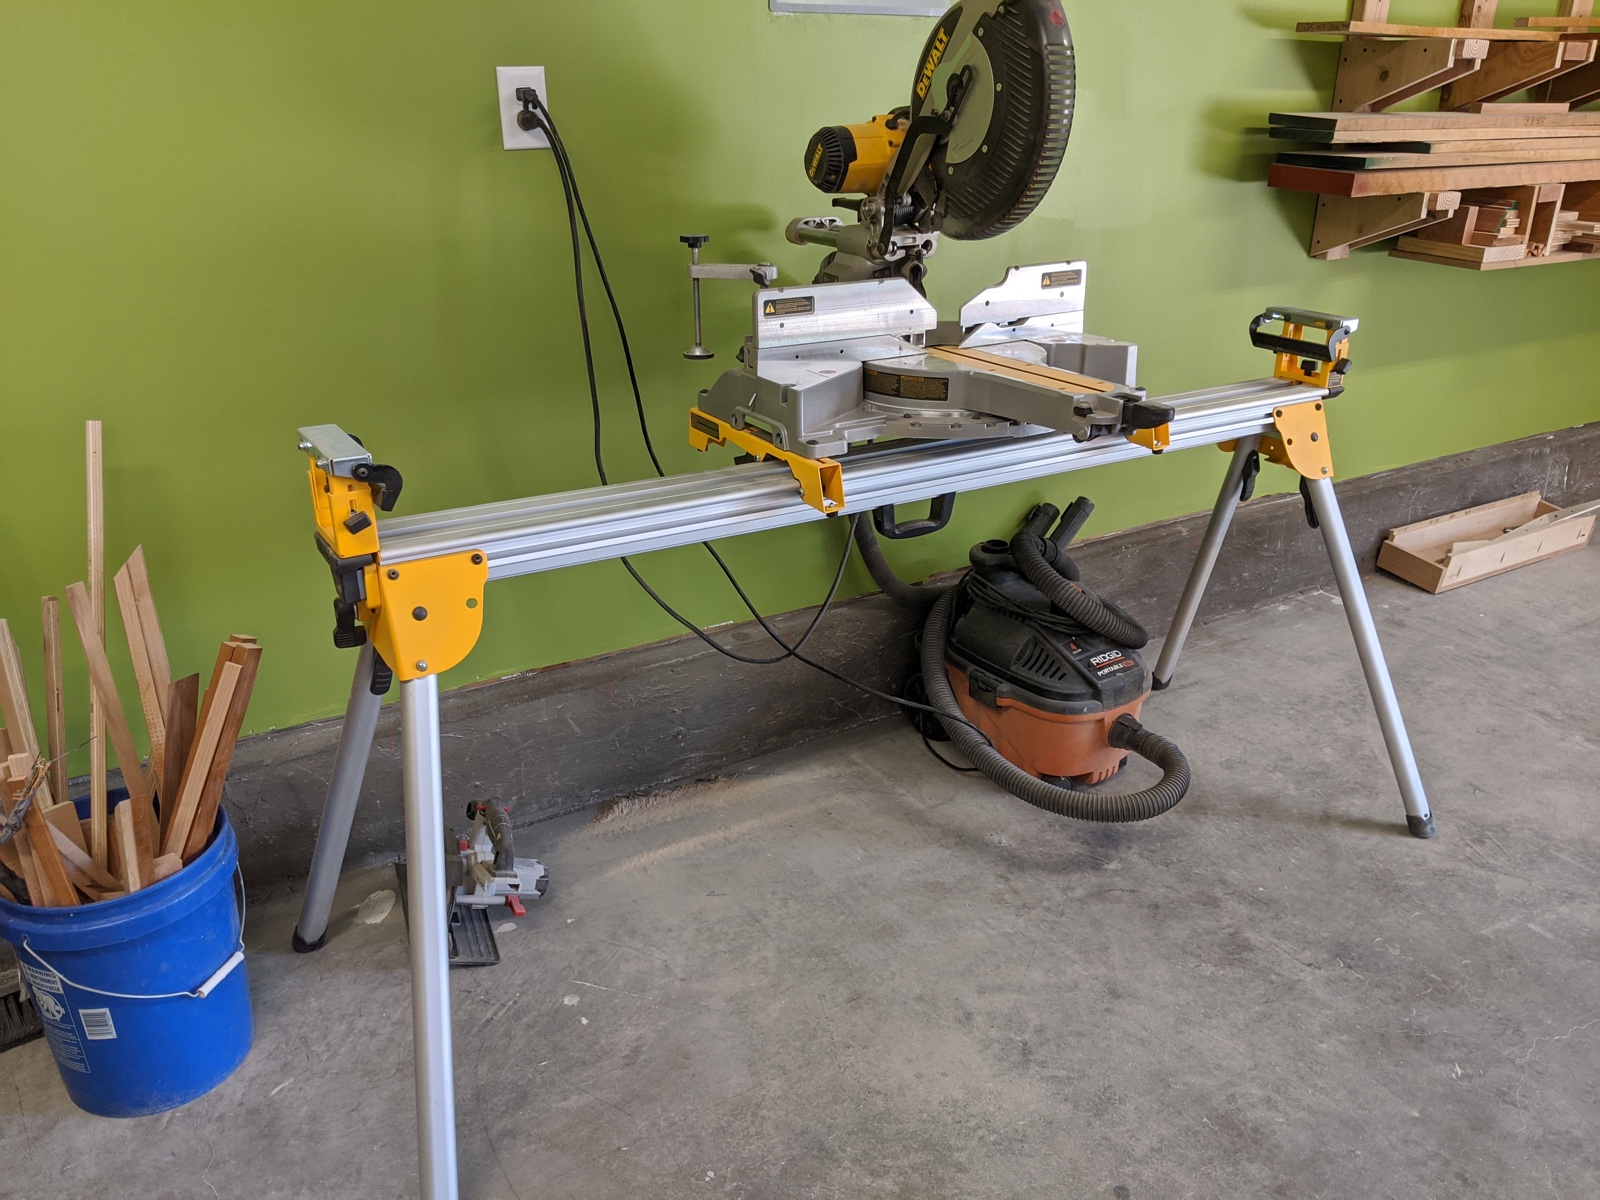
My previous miter saw setup worked well, but there was a ton of empty space underneath and around it that I thought could be put to better use. I wanted a lot of storage so I could put away all the various things that clutter up my workspace.
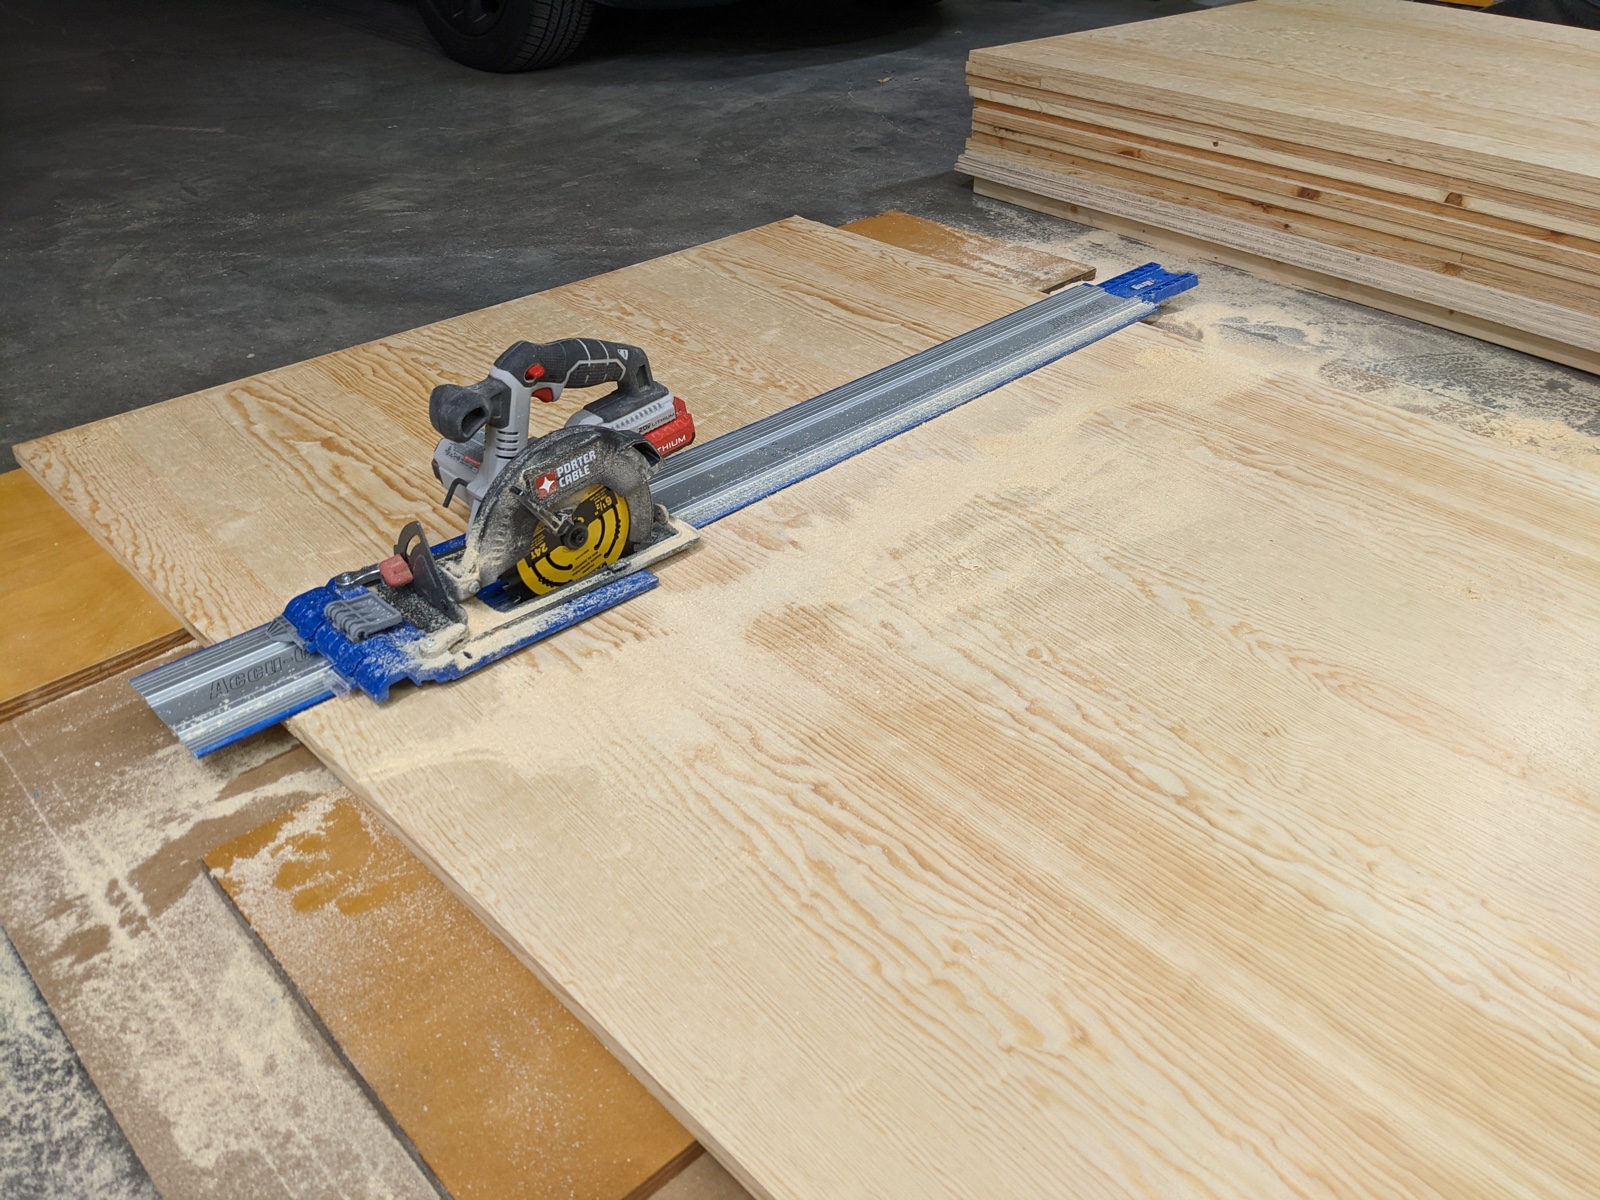
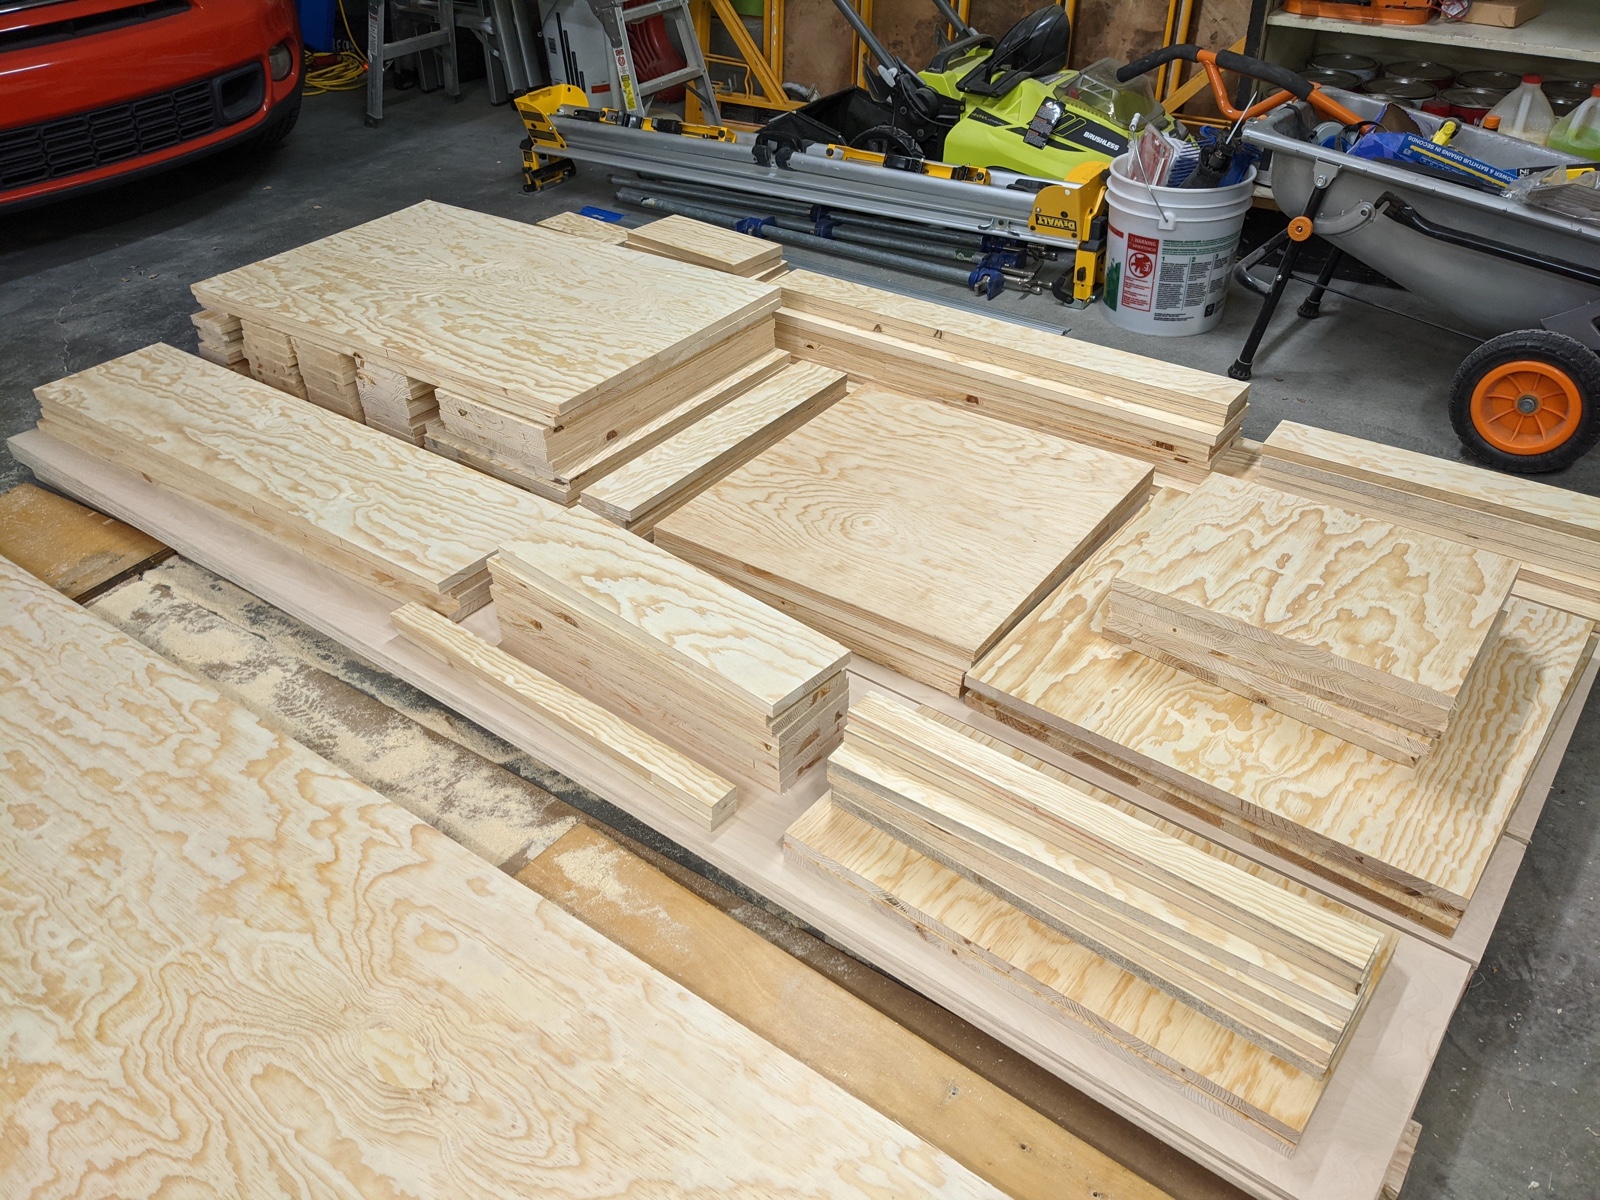
The plans call for 15 sheets of plywood, and I was worried about wrestling full sheets of plywood onto my table saw, so I bought this Kreg guide for my circular saw. The cut isn't as clean as a table saw, but I was very satisfied with it overall. Most of the cabinets are made from pine lumbercore.
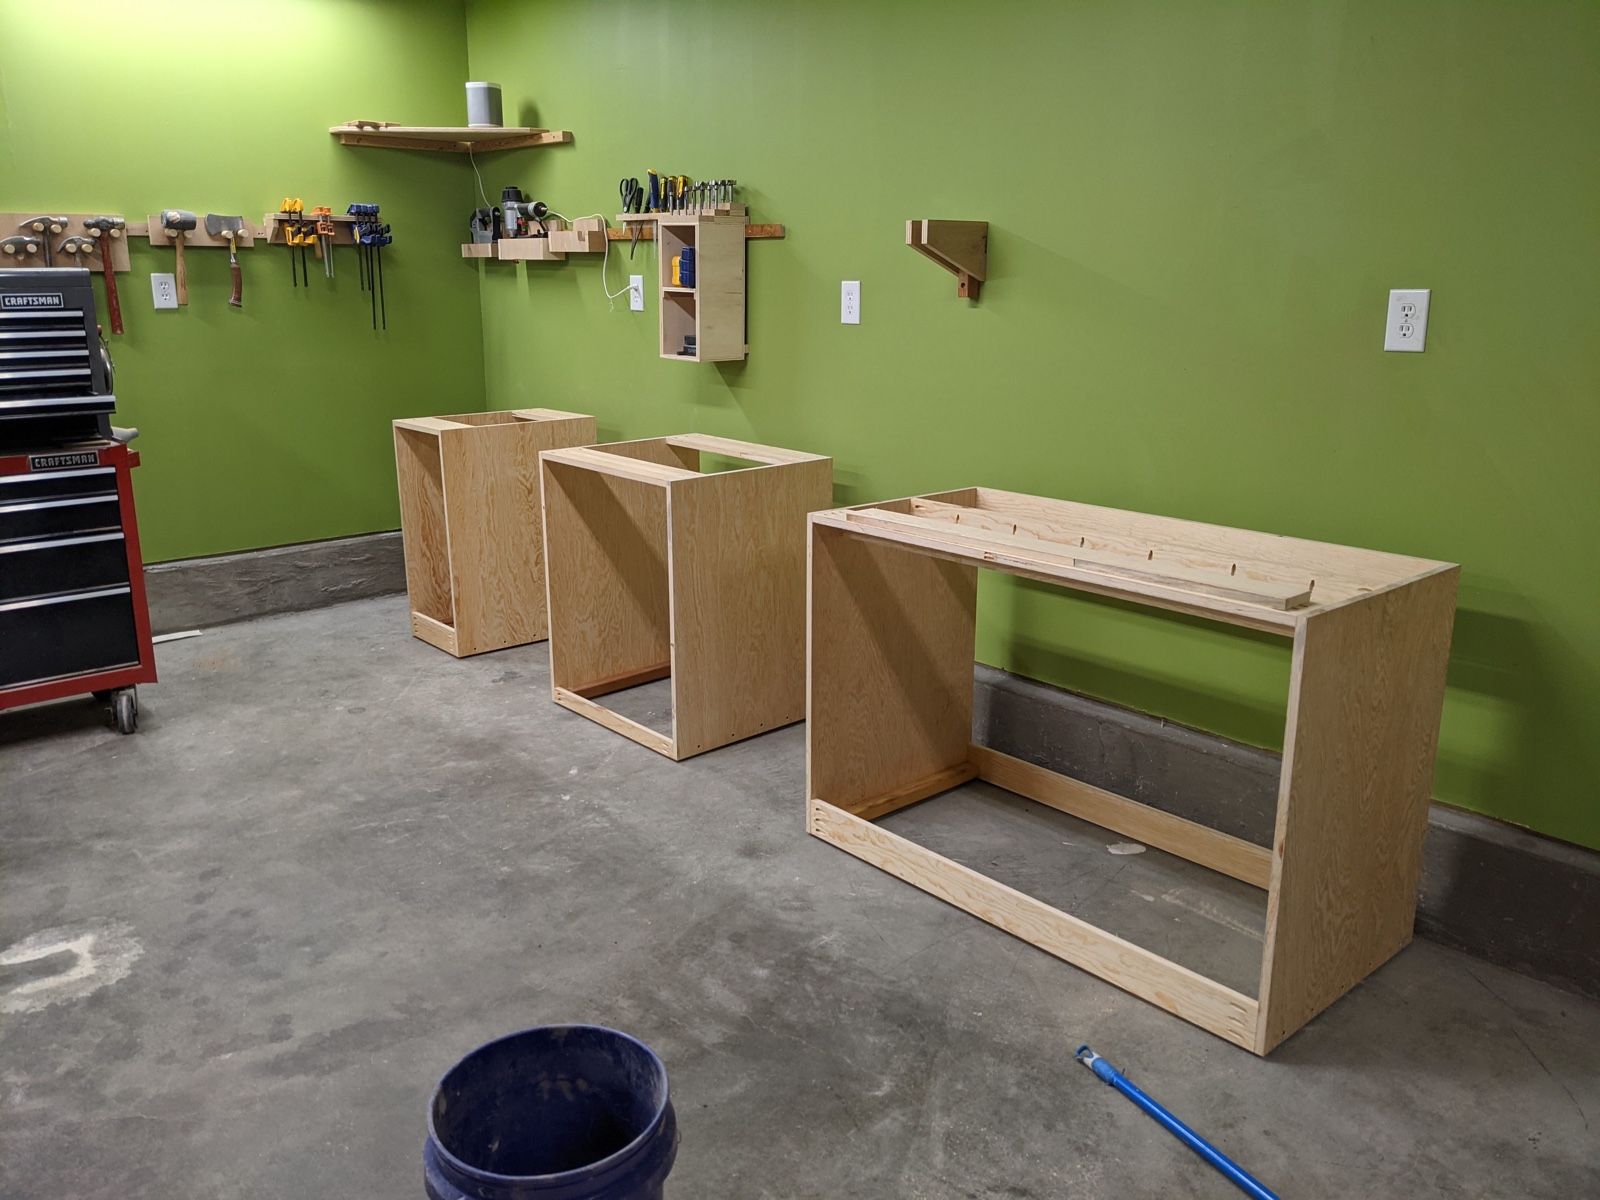
First I built the carcasses for the lower cabinets and leveled them.
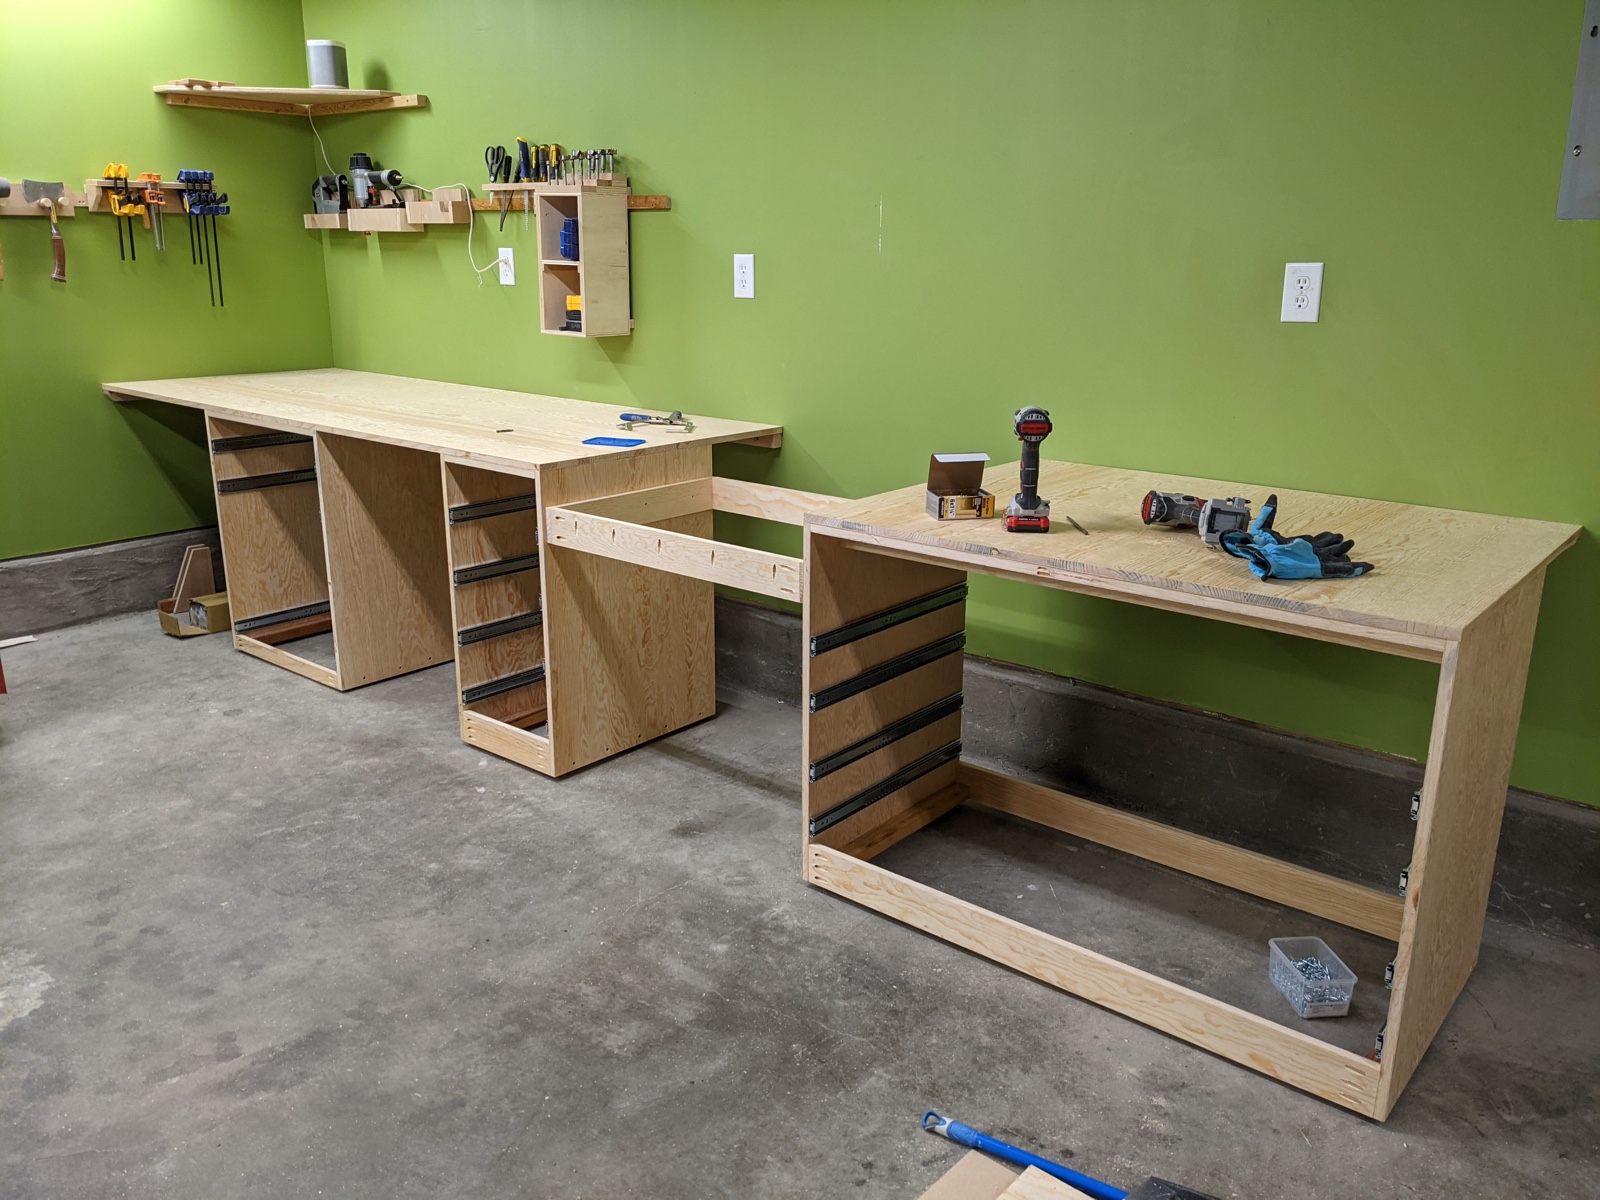
Then I attached the table tops and installed the drawer slides.
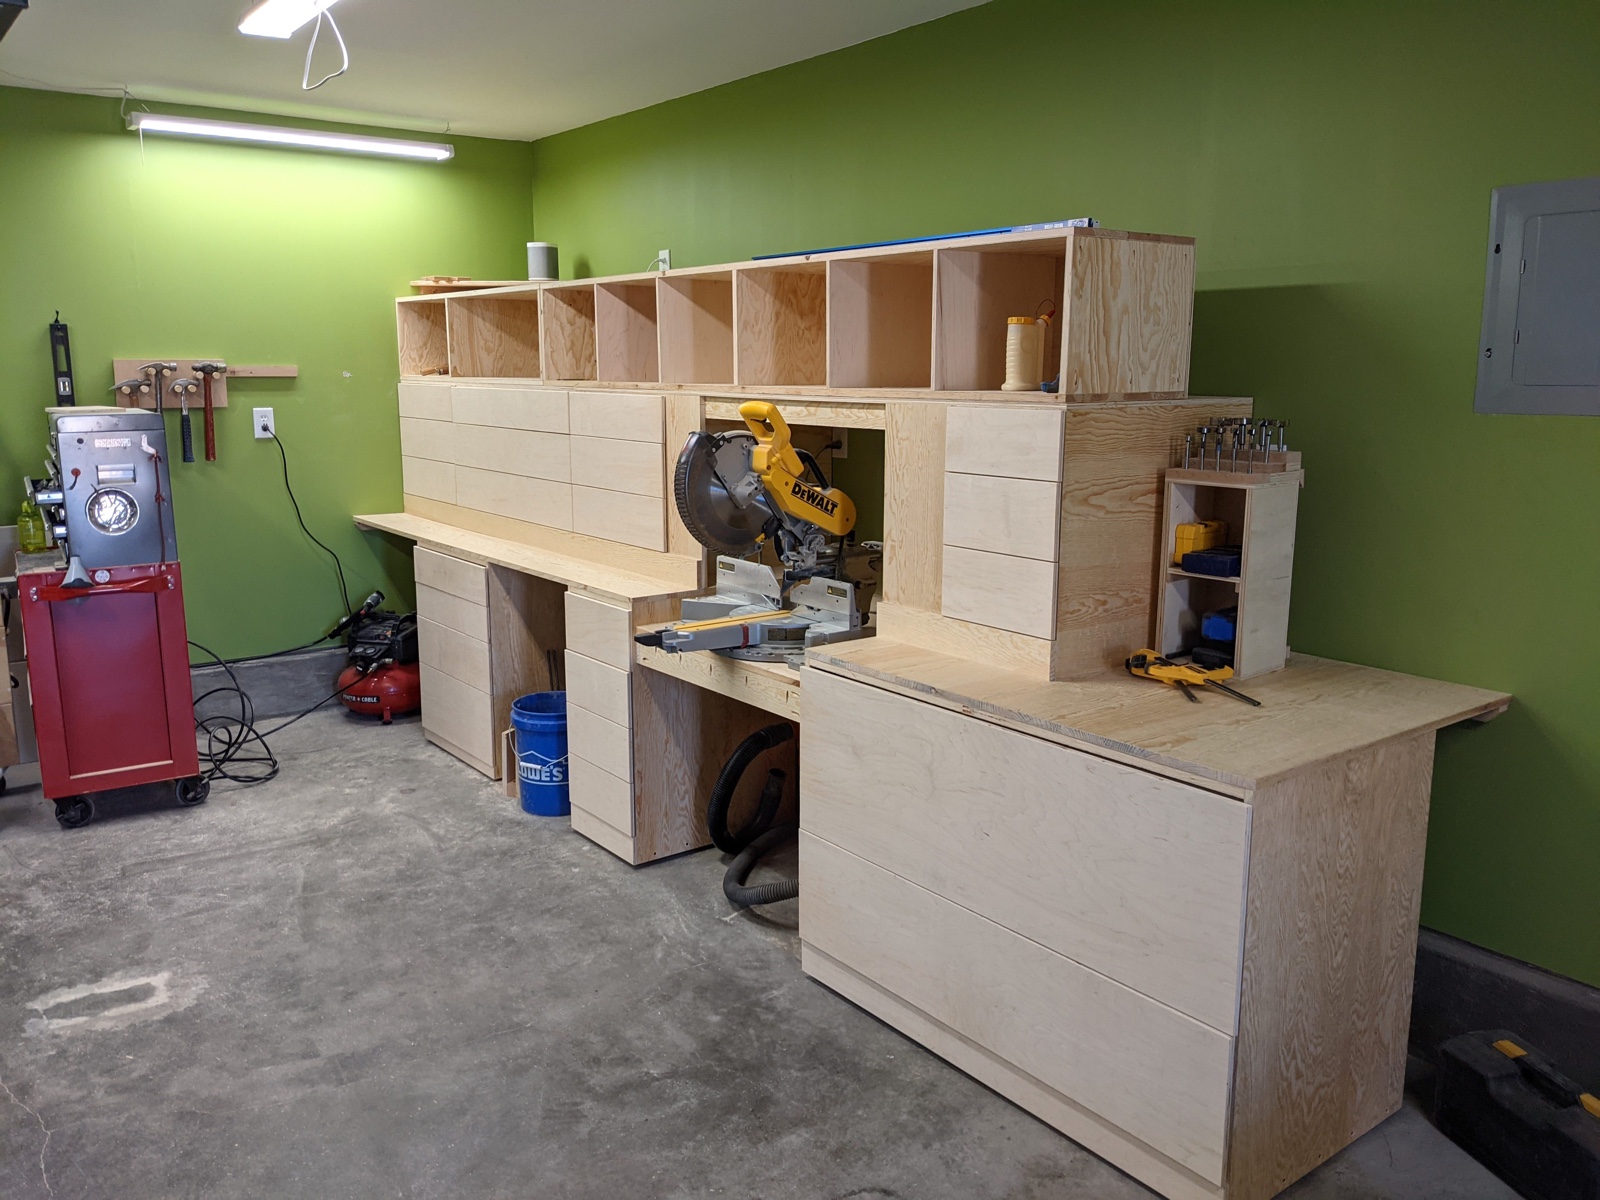
Then I built the upper cabinets and put the miter saw in place. This was nice because the cabinet behind the saw catches a lot of the dust which otherwise was spraying all over the place. I had my shop vac connected to the saw, but that only catches about half of what it spits out.
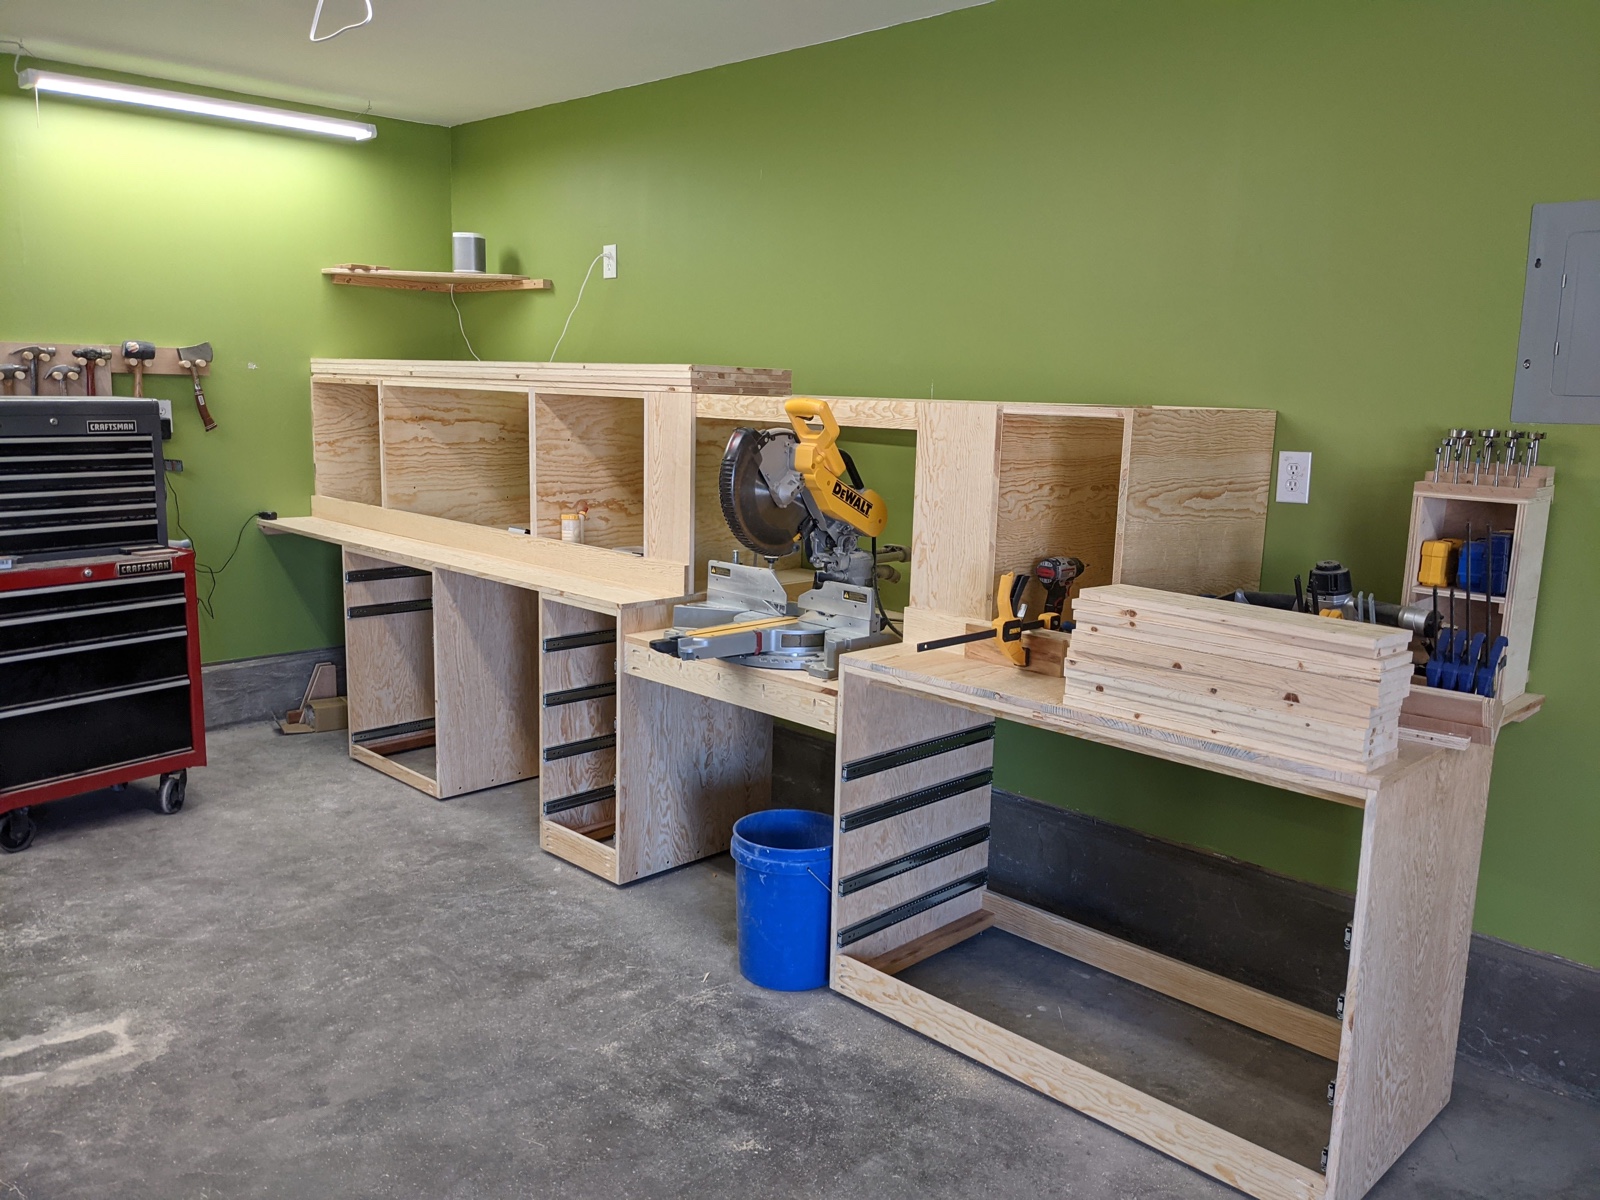
With all the cabinets framed out, next I had to start building drawers upon drawers. This picture is the literal meaning of "you have your work cut out for you".
Upper drawers (12) done:
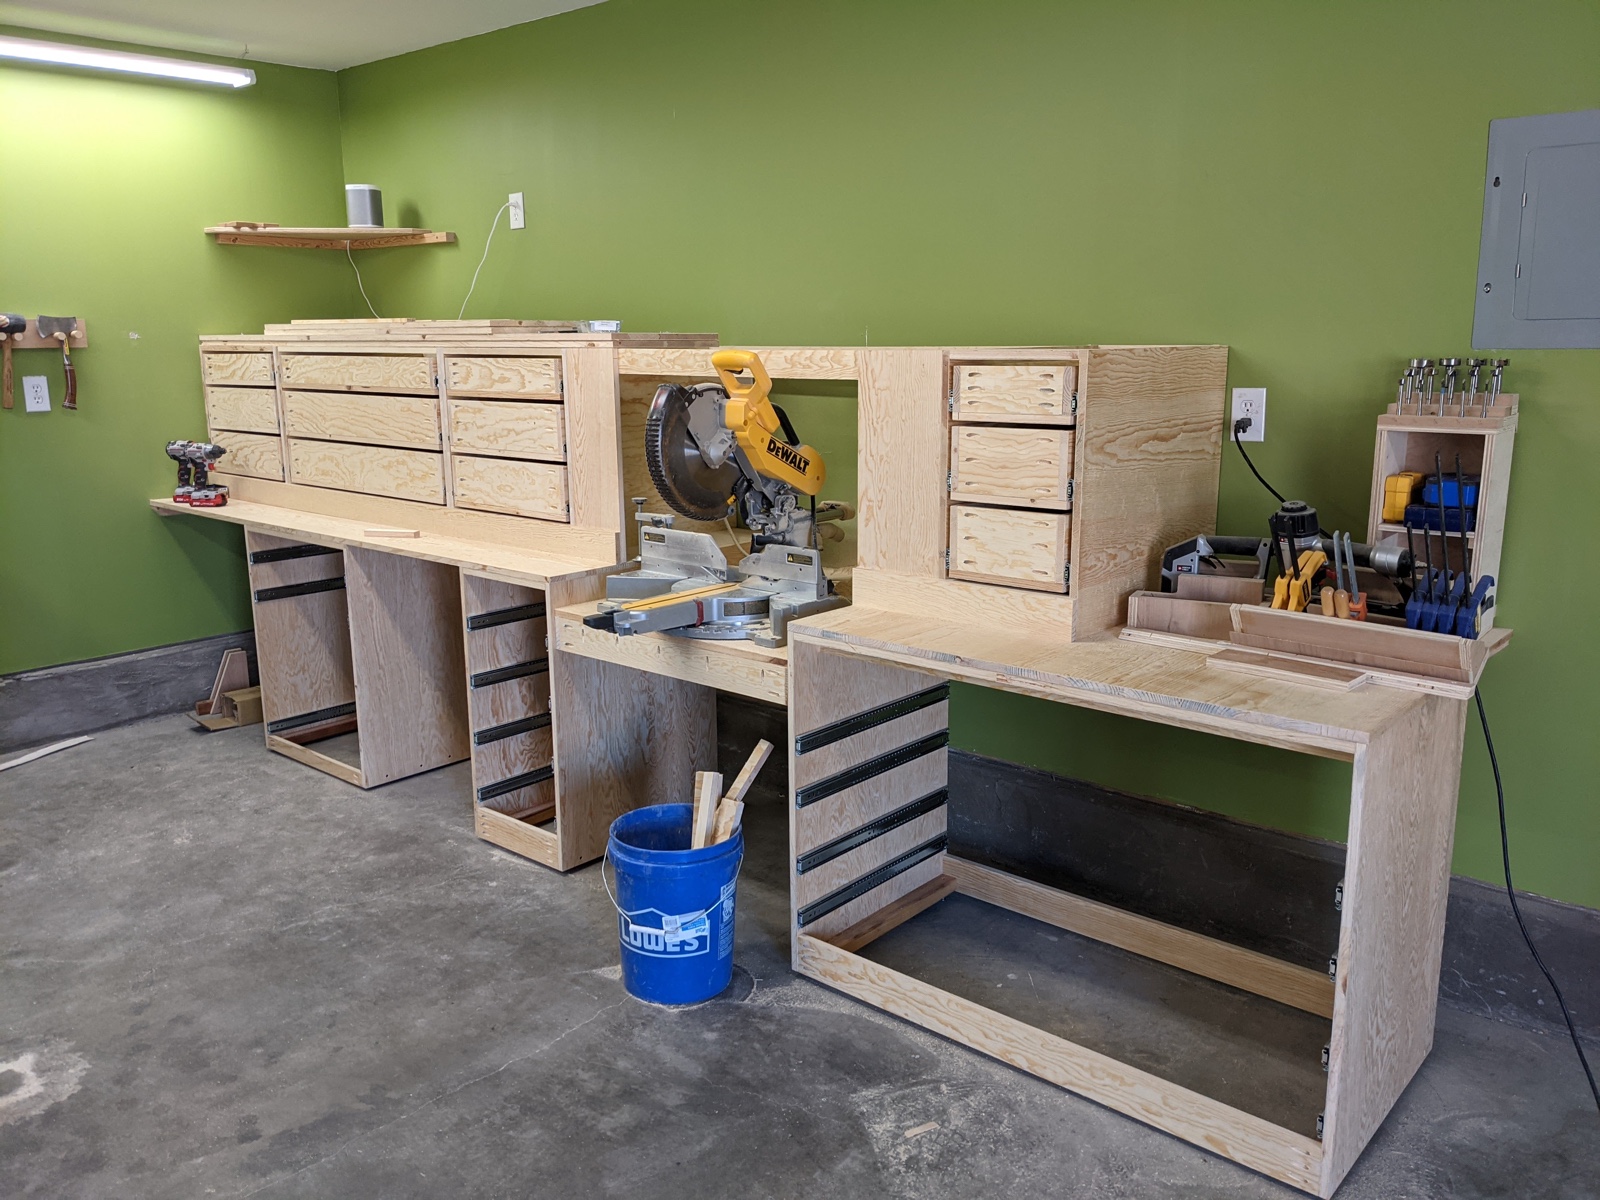
And the lower drawers (10) complete:

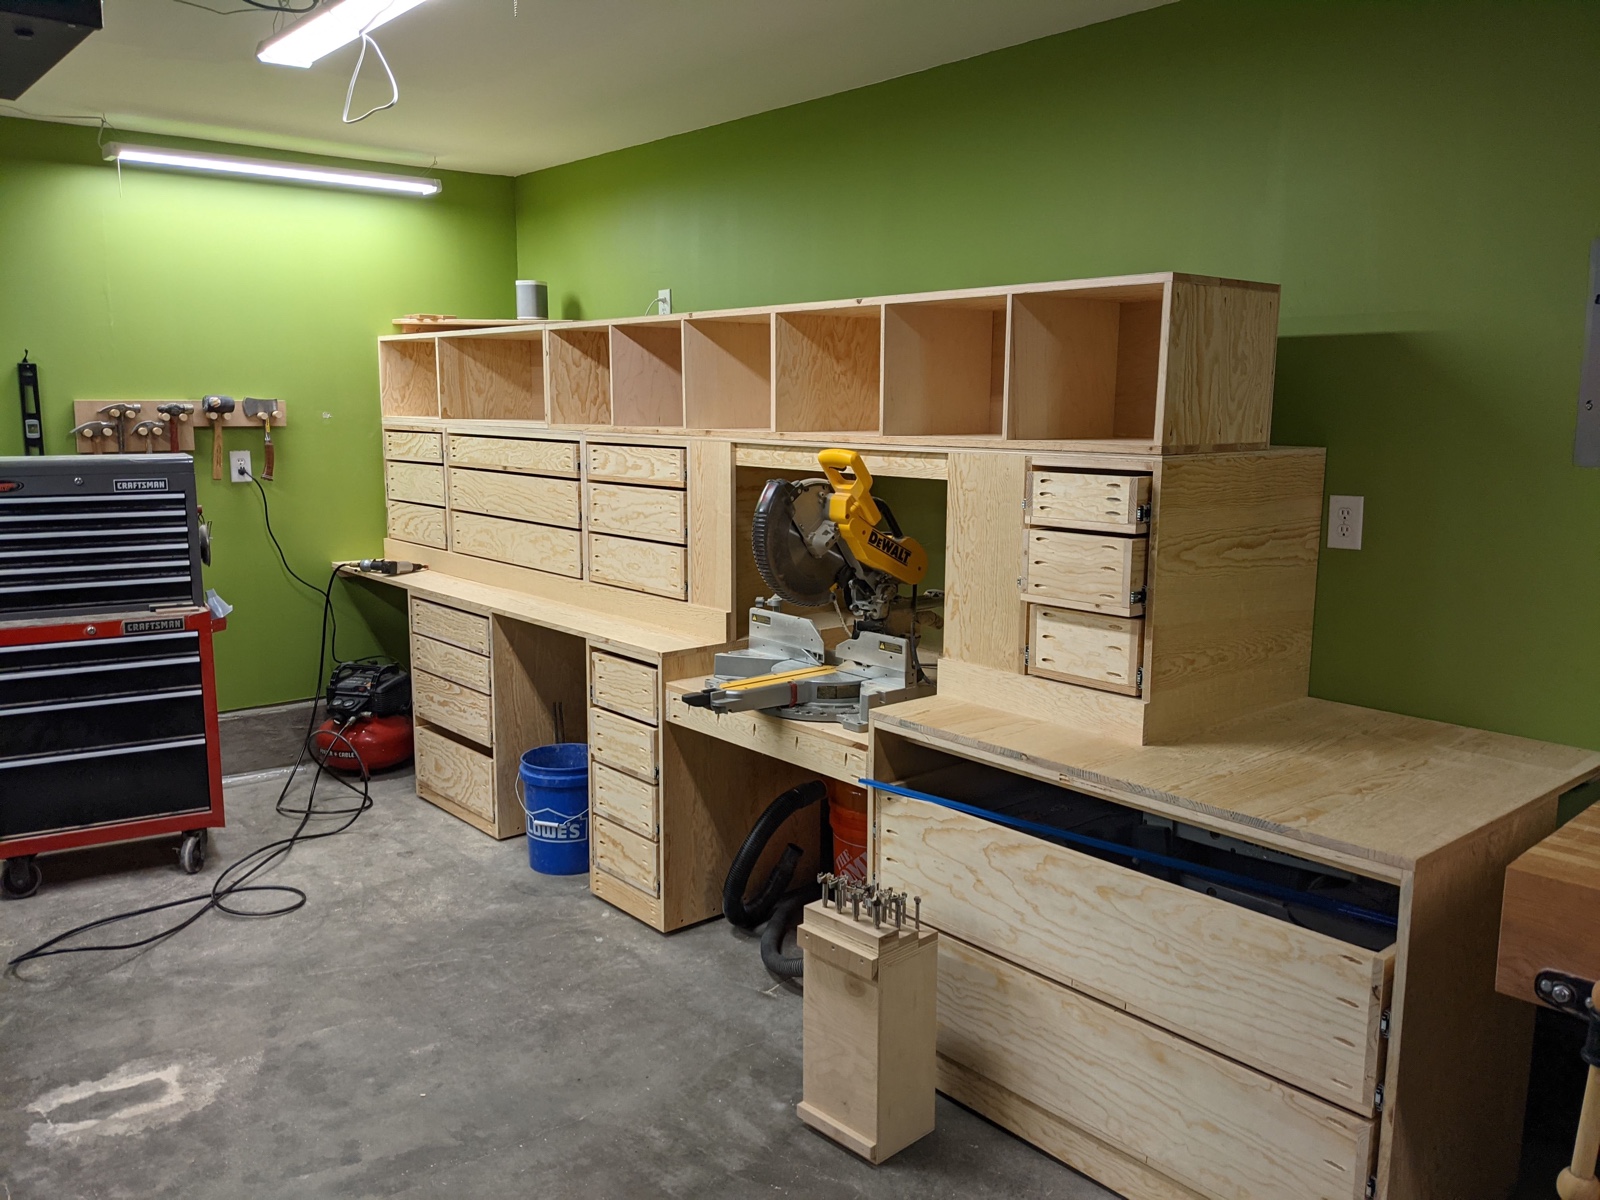
Next I built the upper cubbies that sit on top. These will hold things I use regularly and want at hand quickly. Things like drills, glue bottle, tape measure, pencil, squares, etc.
Next I cut all the drawer fronts and attached them. The drawer fronts are maple plywood.
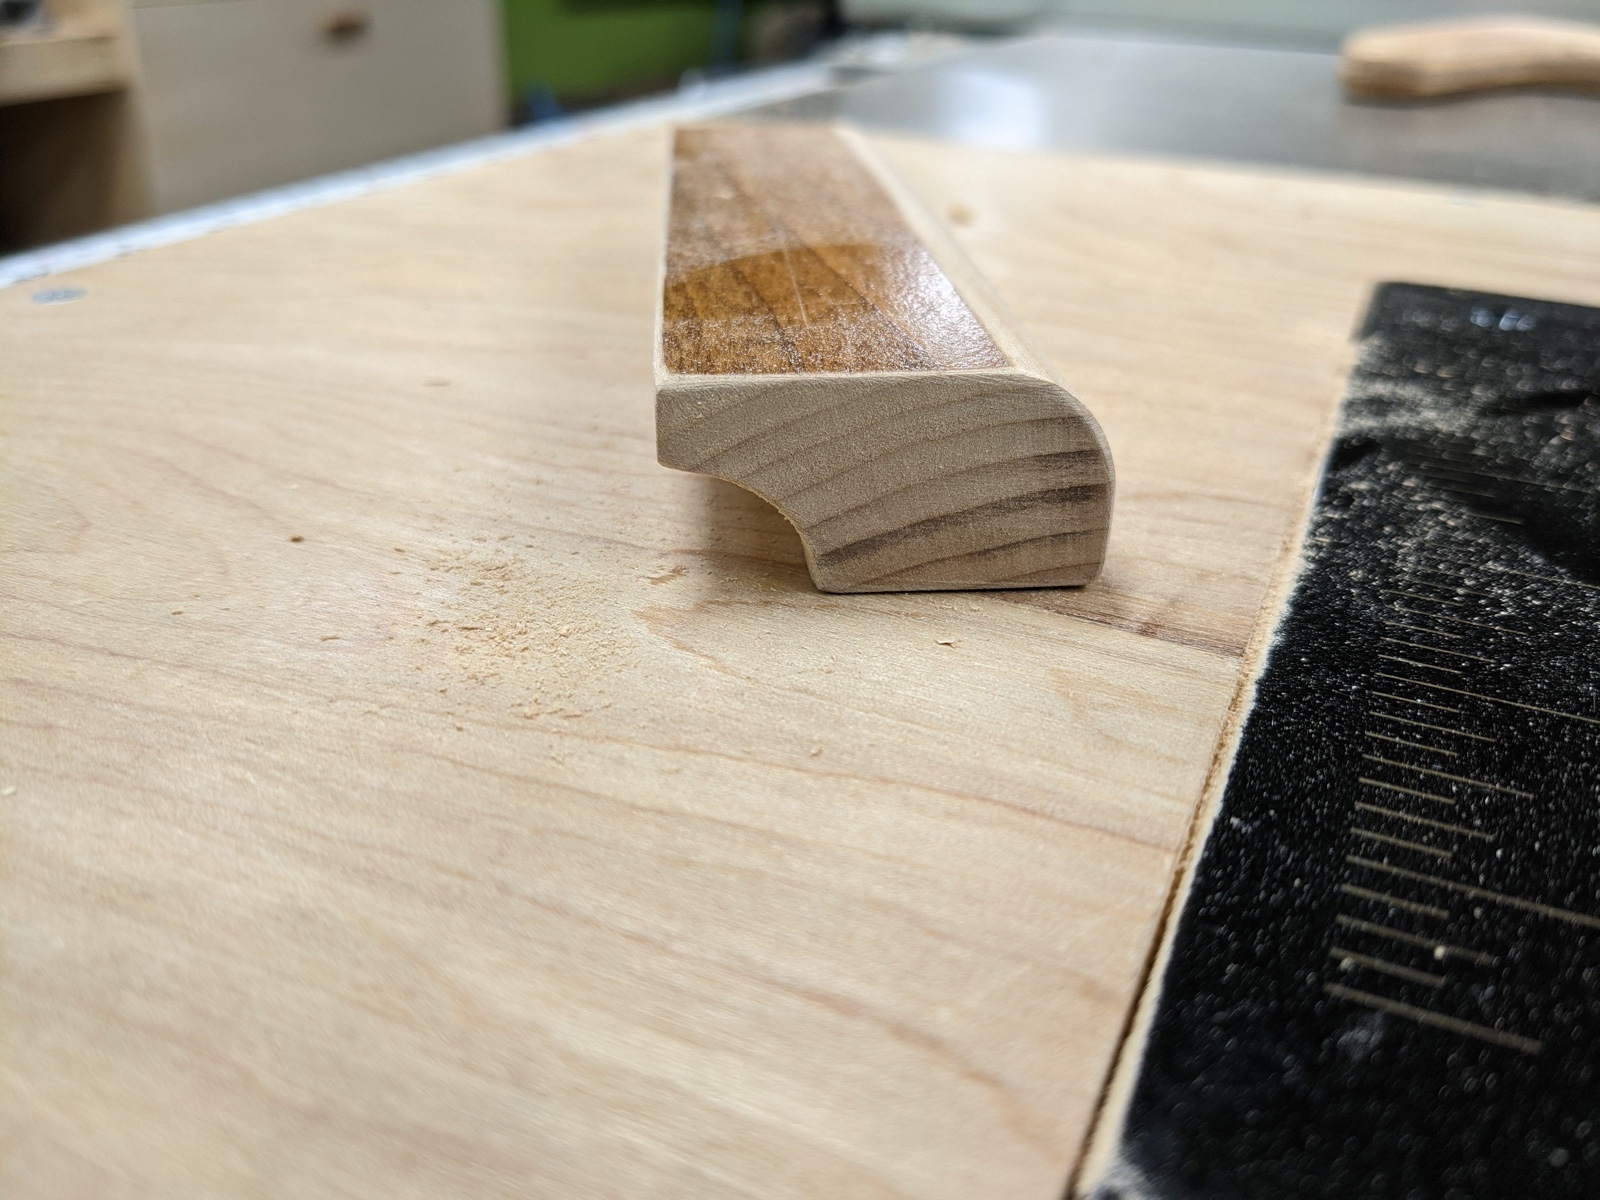
Then I made drawer handles out of some scrap alder by routing a cove on the underside and rounding over the top side. This was surprisingly easy.
Next I attached all the drawer handles, which was the most tedious part of the whole project.
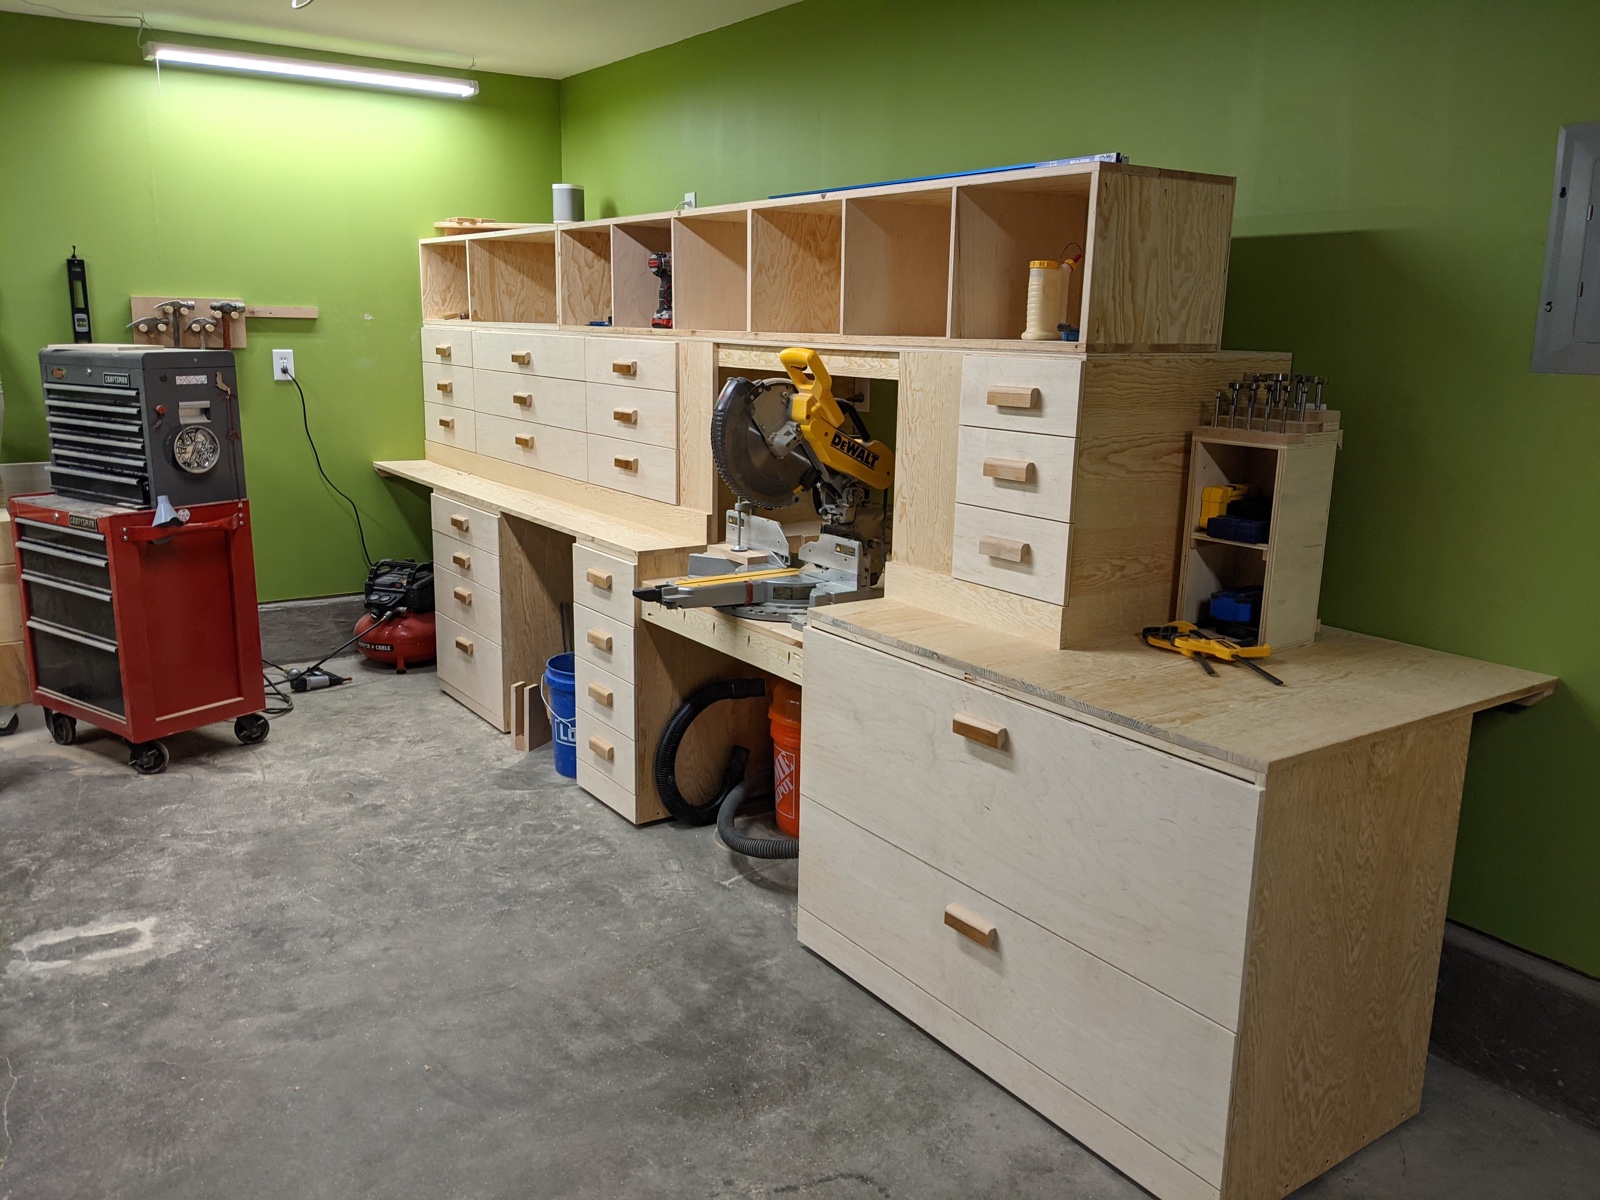
Then I put some trim on to cover up some of the plywood edges to protect them from getting damaged. The strip above the saw is alder and the pieces at saw level are cherry.
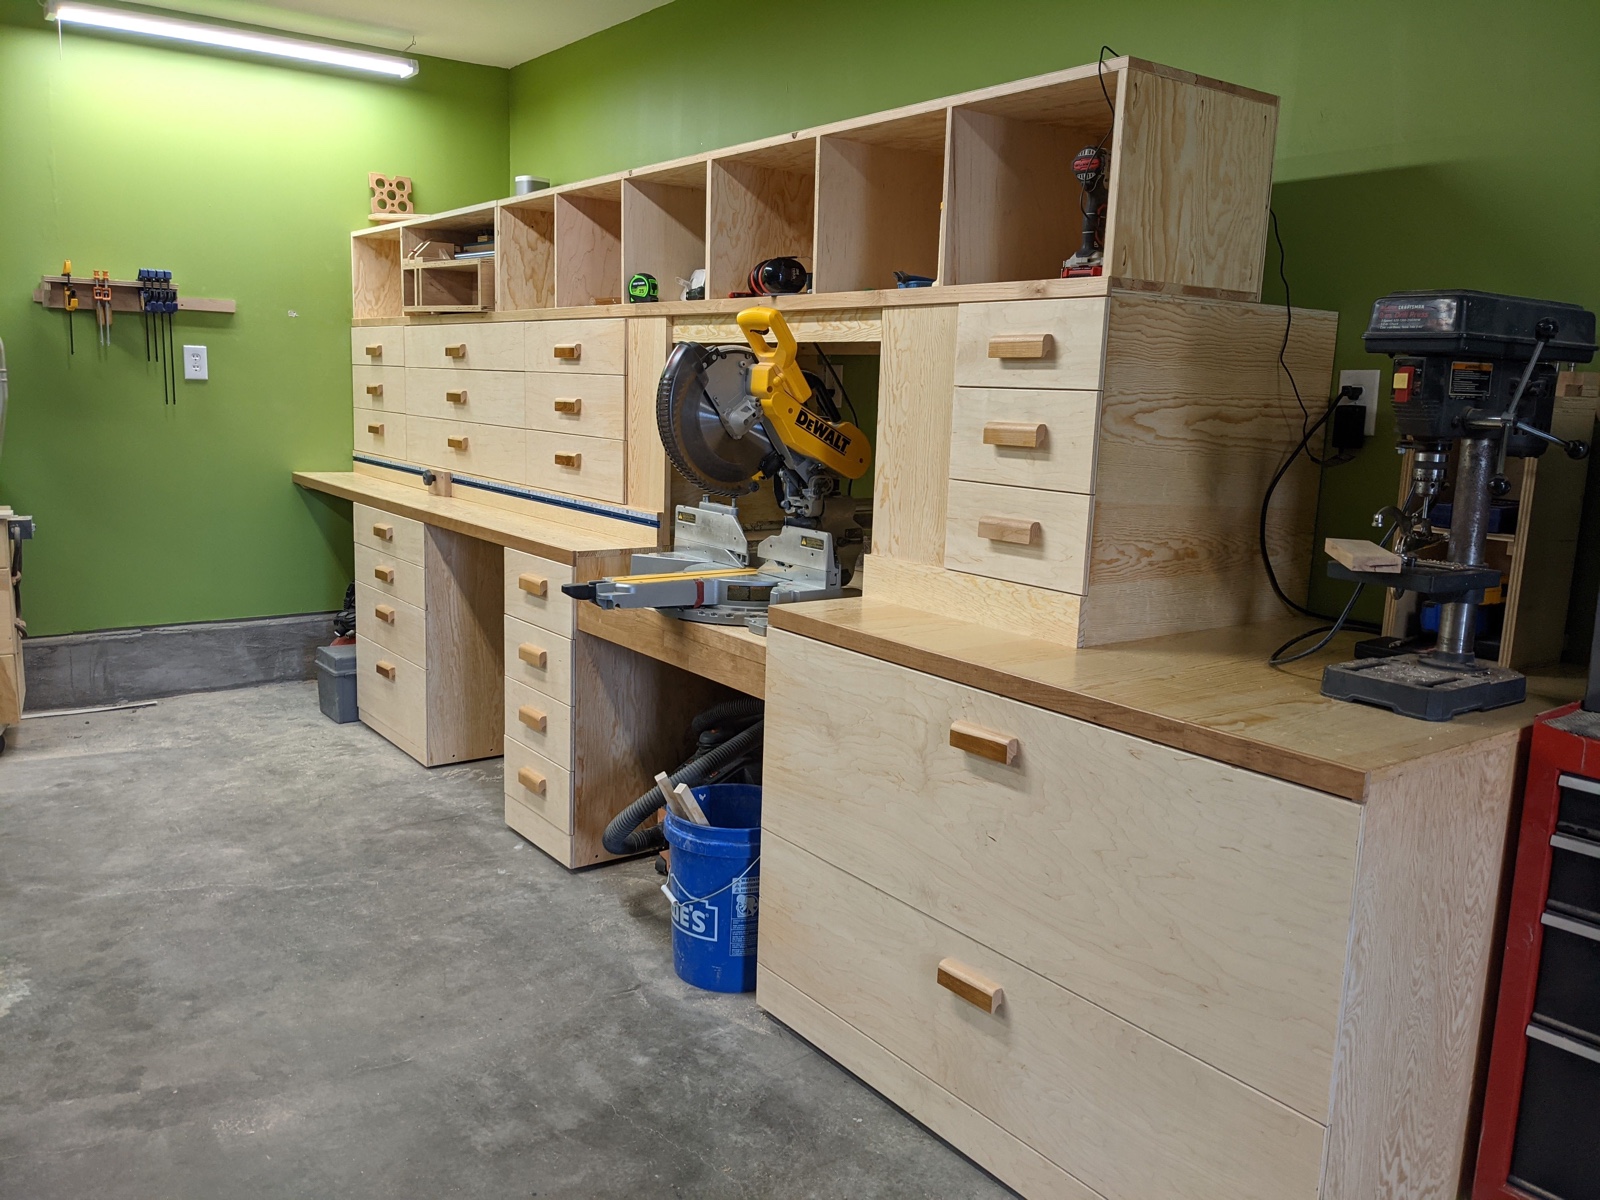
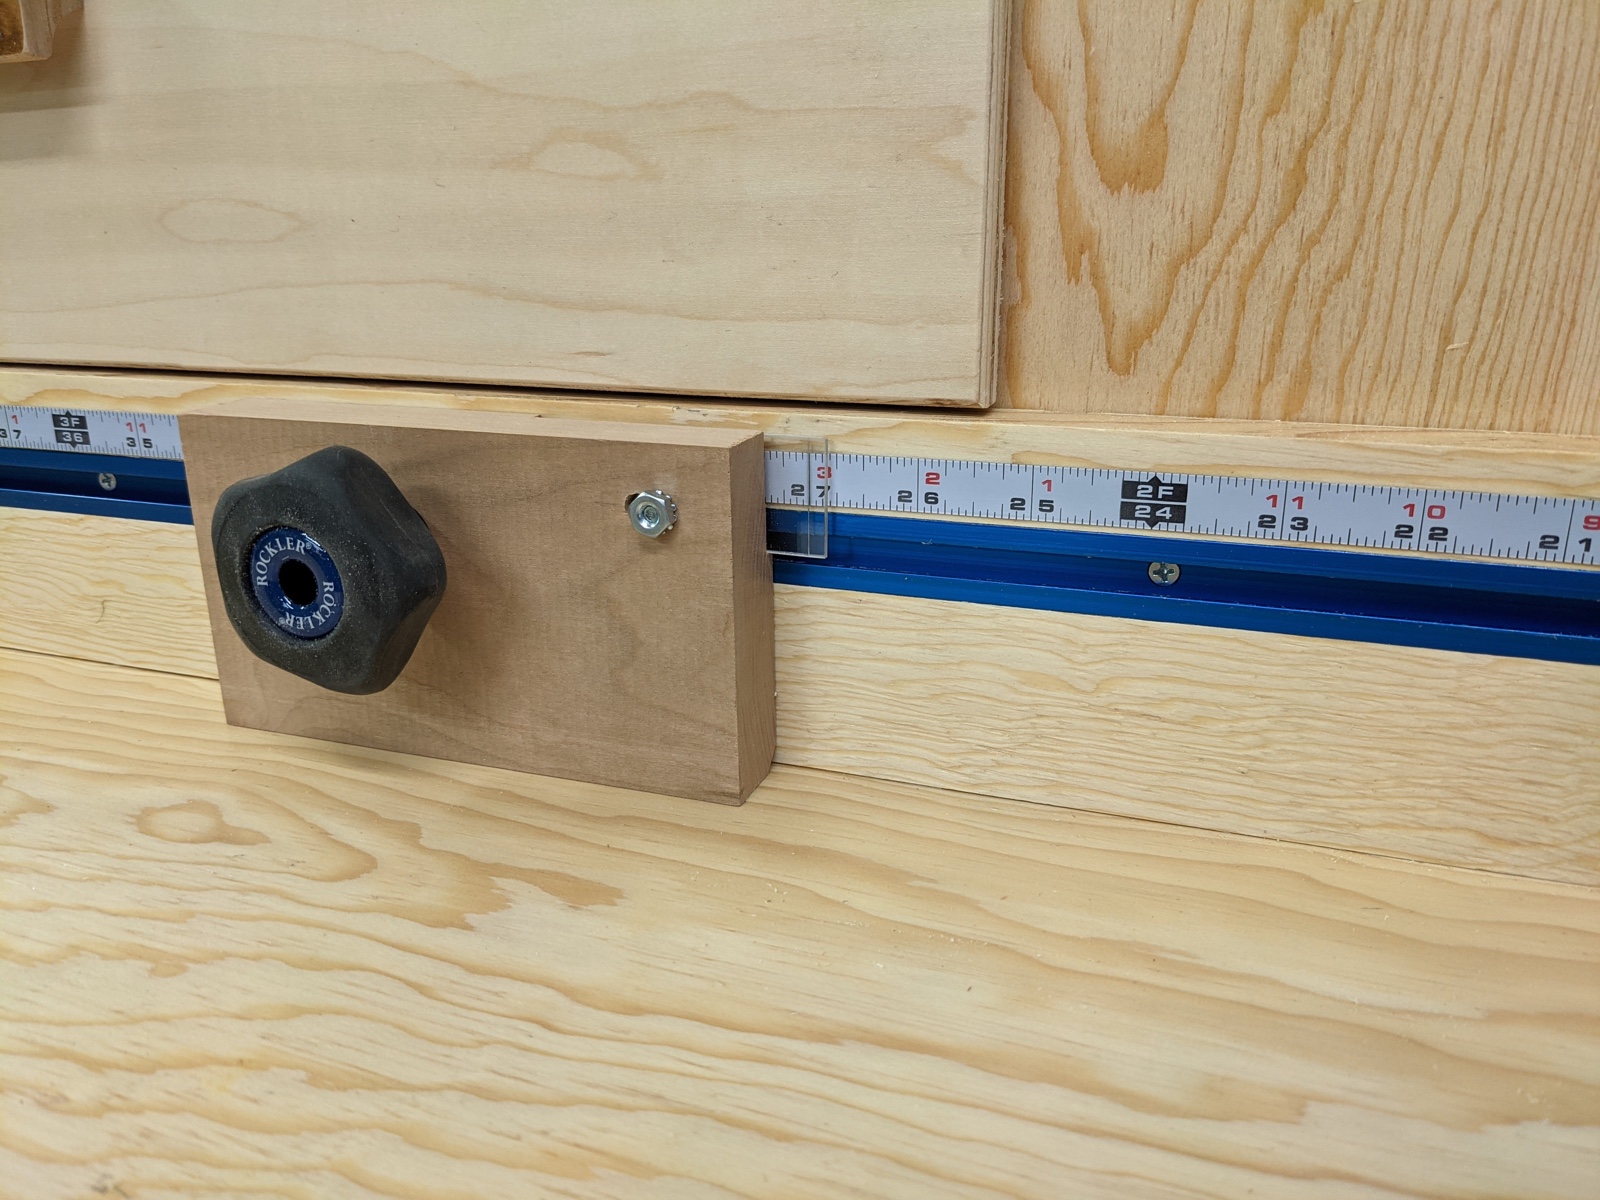
I installed a stop block system on the left side of the saw, which should significantly decrease how long it takes to make an accurate cut. My least favorite thing about using the miter saw is how long it takes to get an accurate cut. I always cut just a tad long and then fine tune it to just right, so the process ends up looking like: measure, make a pencil line, use a square to draw across the piece, re-measure to see how close to the line to cut, make a cut, re-measure, skim a little off the end, repeat until it's perfect. With the stop block, I can just set the length I need and make the cut, plus it makes repeatable cuts very easy.
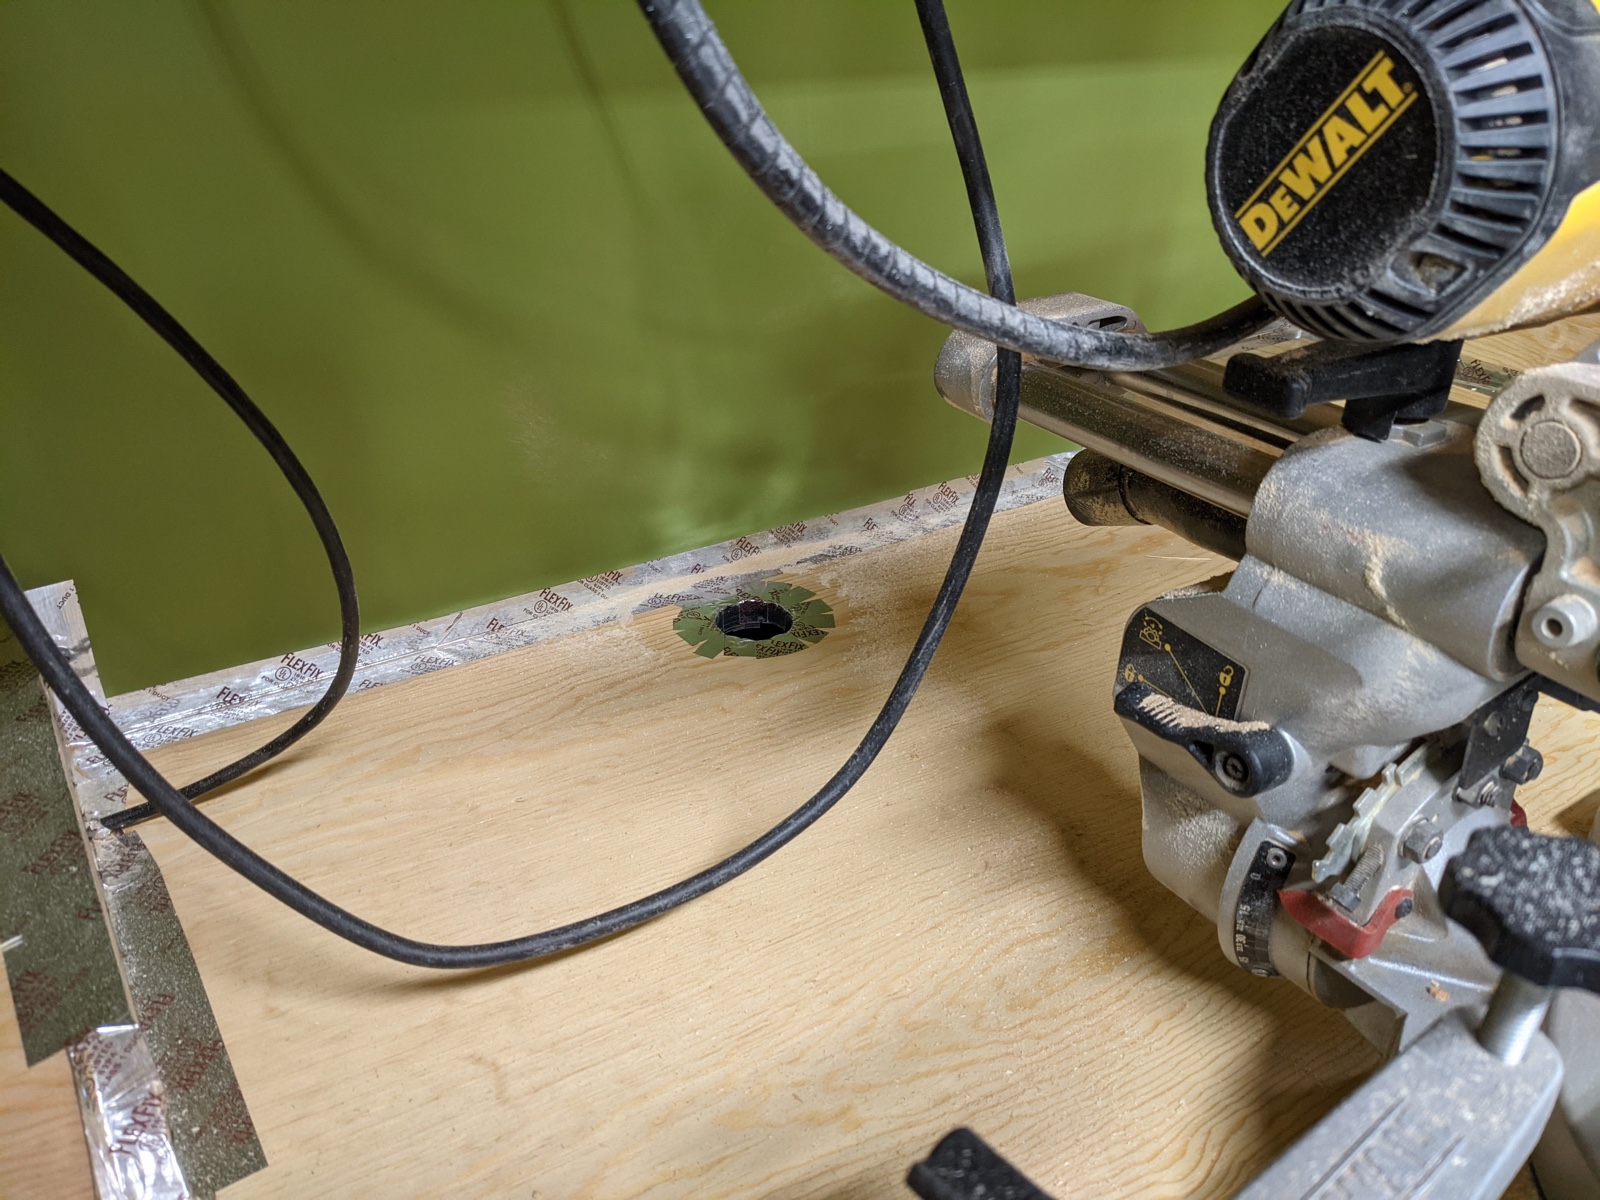
There's also a dust port at the back of the cabinet to catch a lot of the dust, and anything that doesn't get caught I can sweep into the vacuum pretty easily. I taped all the gaps to increase negative pressure in the cavity and hopefully catch more dust. I have the vacuum on a switch that automatically turns it on when the saw is running.
I'm still trying to figure out what to put in each drawer. I think I'm going to end up with some empty drawers, but having room to grow isn't a bad thing. I'm also considering putting in some vertical dividers between the bottom cabinets to store partial sheets of plywood. I have some random scraps leftover that I don't have a good place to store.